WAVEI4DC Reset & Teardown (FCC ID 2BDC6-WAVEI4DC)
Factory reset and internal photos for Shelly Group WAVEI4DC. Shelly smart plug.
Before you buy the Shelly Group WAVEI4DC, check what's inside.
The Shelly WAVEI4DC is a Z-Wave enabled 4-digital input controller designed for smart home automation. It allows integration with Z-Wave gateways and can control other devices or scenes via connected push-buttons.
⚠️ NOTE: Always disconnect power before installation or maintenance. Ensure correct voltage and polarity are applied.
Quick Specs
- Manufacturer: Shelly Group
- Model: WAVEI4DC
- Protocol: Z-Wave
- Chipset: ESP32
- Ecosystem: Shelly
- App: Shelly App
🔧 Geek Corner (Flashing Info)
- Chipset: Unknown
- Flashable: ❌ No
- Info: Device is Z-Wave and not designed for firmware flashing with alternative firmwares like Tasmota or ESPHome.
Reset Guide
Factory reset, led signalization, z-wave® command classes, parameters, and much more, refer to the extended user guide at: https://shelly.
User Manual
Scanned pages from the official user manual:
External Photos
Photos of the device exterior:

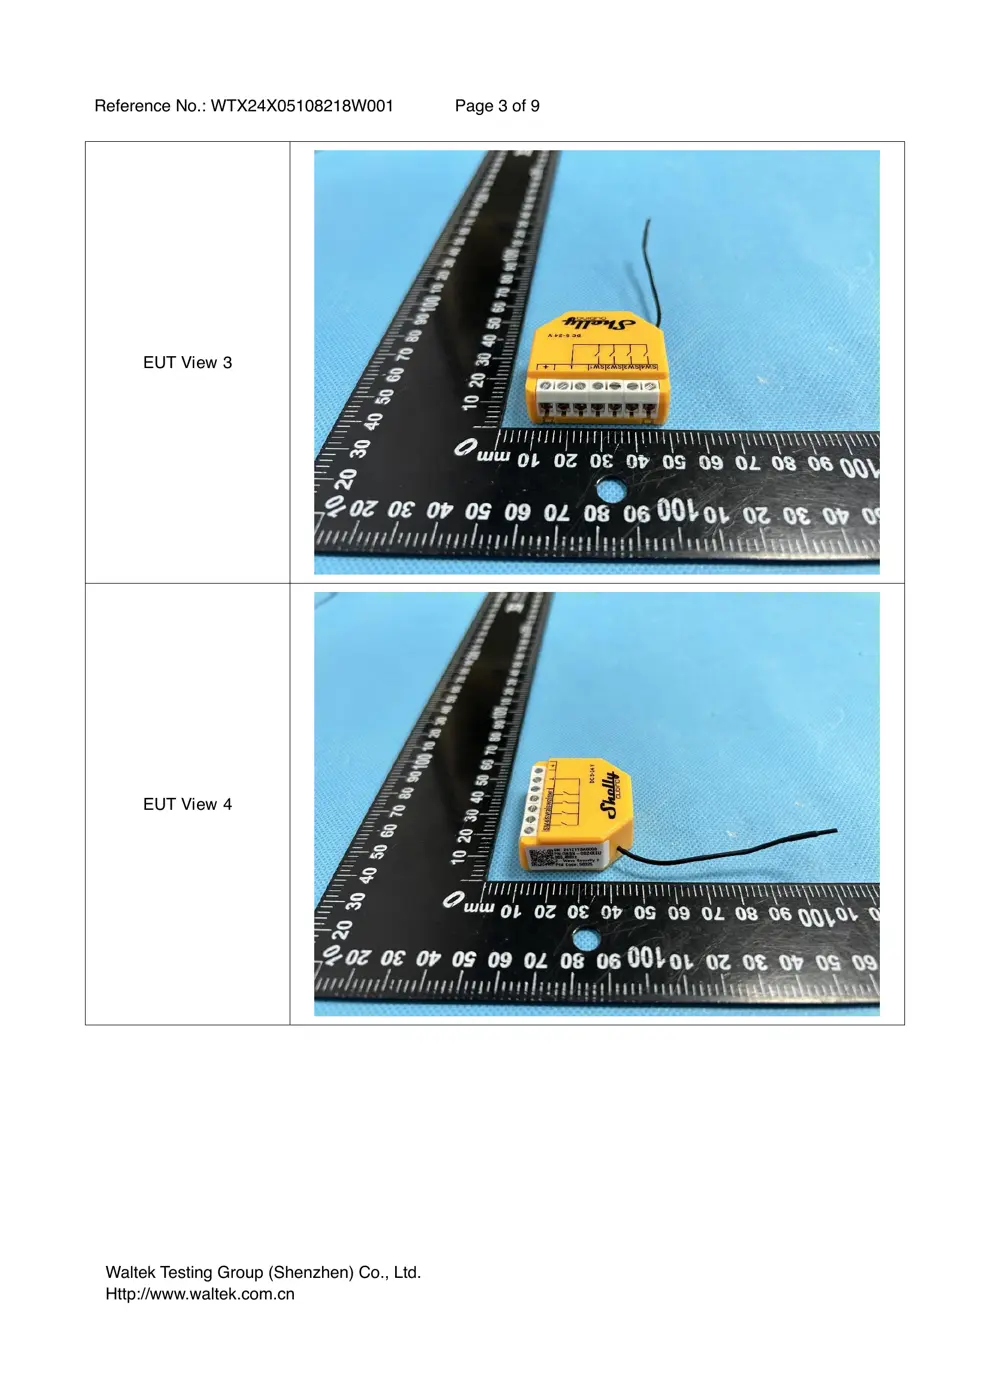
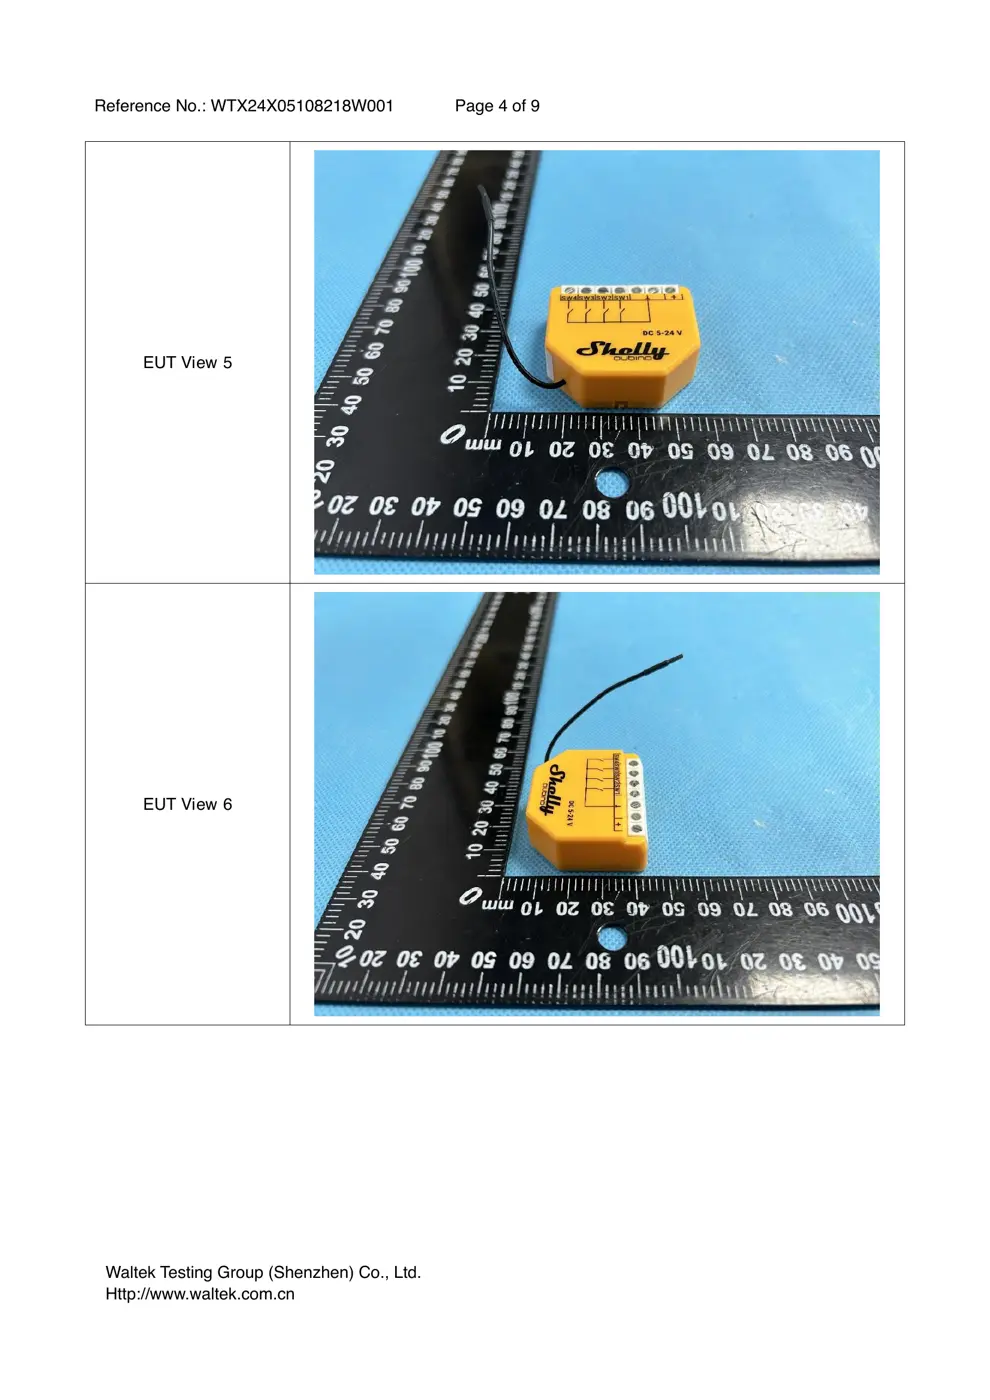
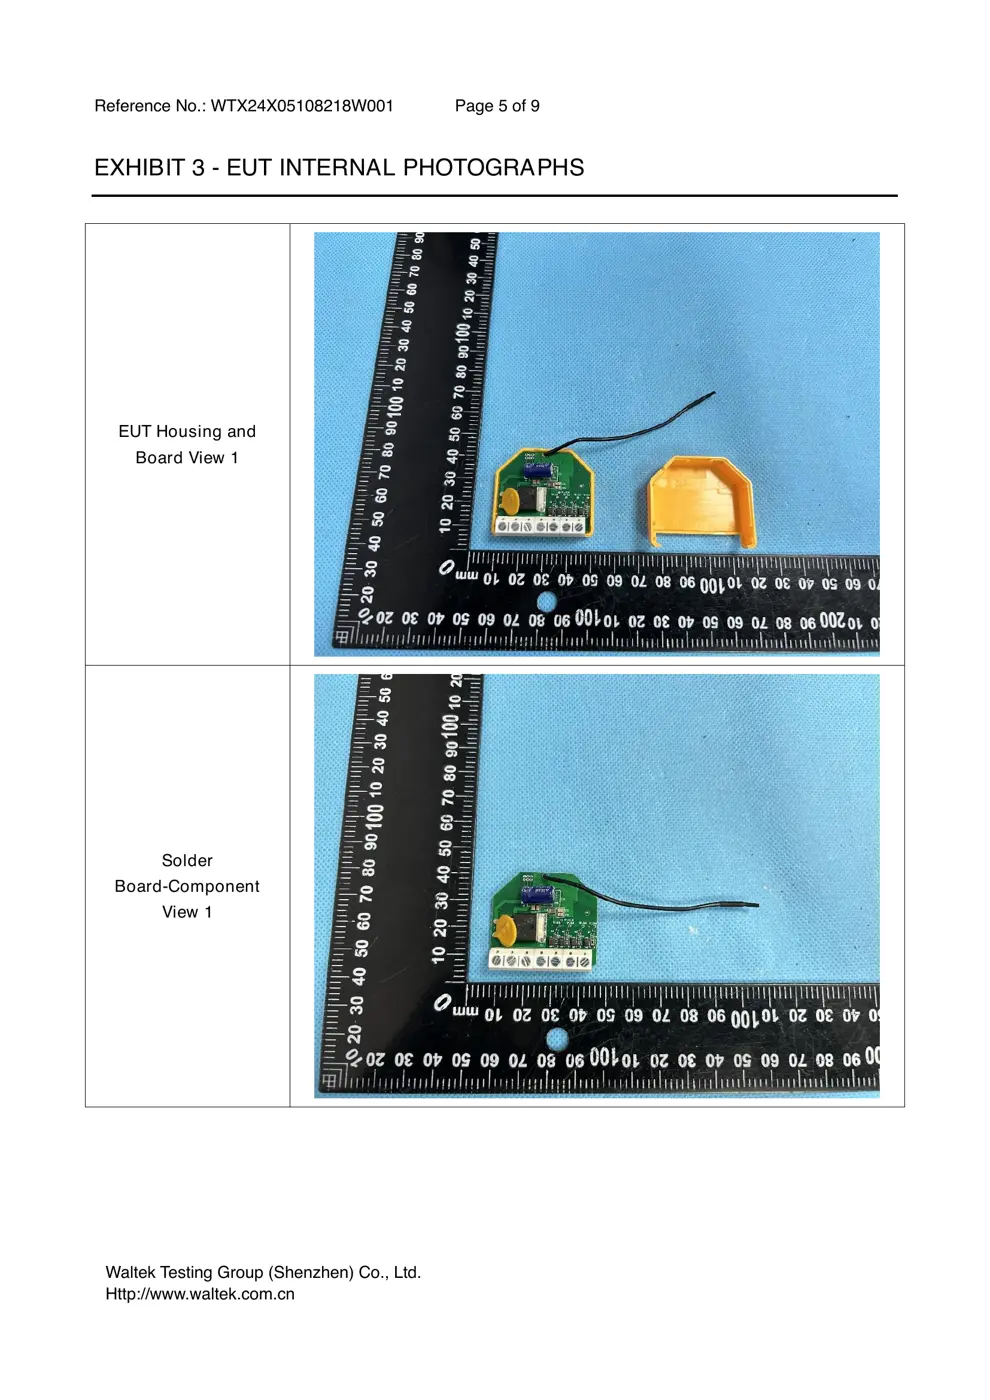
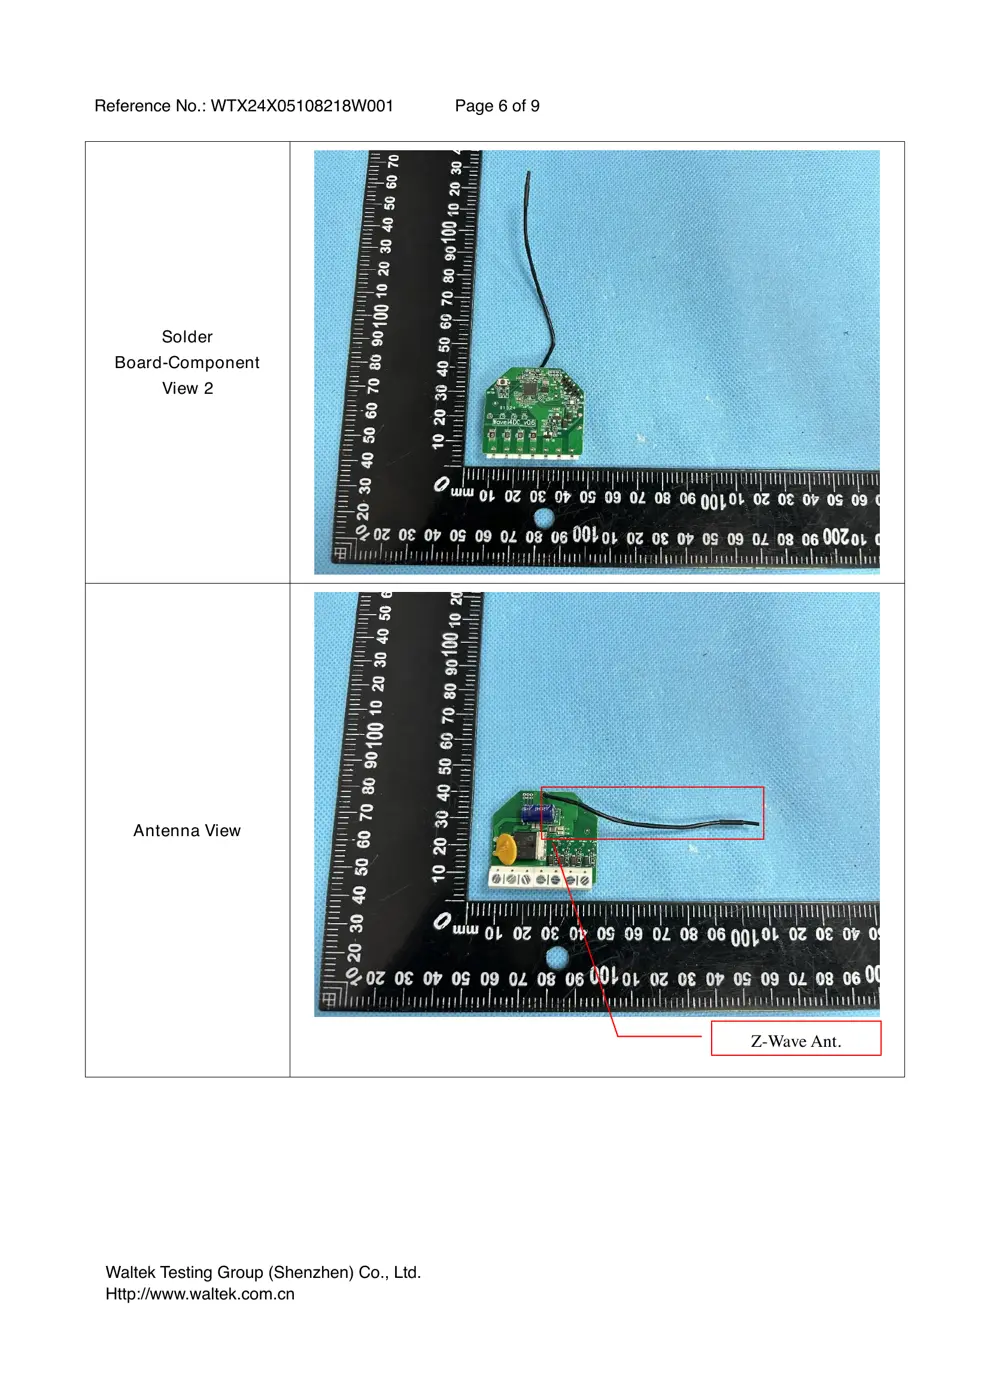
Internal Photos
Teardown photos showing the PCB and components:

Verdict
The WAVEI4DC is a Z-Wave device from the Shelly ecosystem.
📄 Click to view full text manual (SEO)
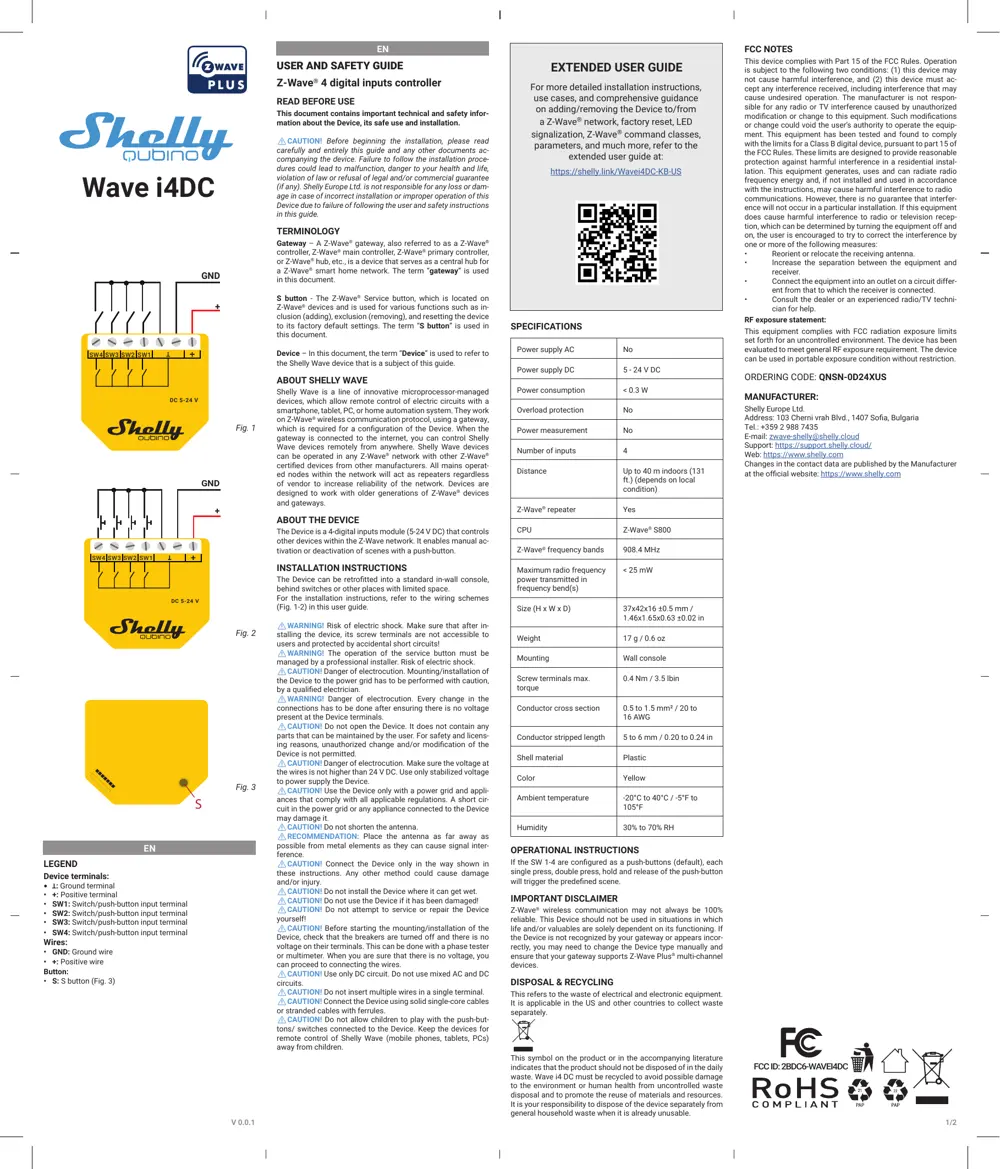
EN
LEGEND
Device terminals:
• ꓕ: Ground terminal
• +: Positive terminal
• SW1: Switch/push-button input terminal
• SW2: Switch/push-button input terminal
• SW3: Switch/push-button input terminal
• SW4: Switch/push-button input terminal
Wires:
• GND: Ground wire
• +: Positive wire
Button:
• S: S button (Fig. 3)
EN
USER AND SAFETY GUIDE
Z-Wave® 4 digital inputs controller
READ BEFORE USE
This document contains important technical and safety infor -
mation about the Device, its safe use and installation.
⚠CAUTION! Before beginning the installation, please read
carefully and entirely this guide and any other documents ac -
companying the device. Failure to follow the installation proce -
dures could lead to malfunction, danger to your health and life,
violation of law or refusal of legal and/or commercial guarantee
(if any). Shelly Europe Ltd. is not responsible for any loss or dam-
age in case of incorrect installation or improper operation of this
Device due to failure of following the user and safety instructions
in this guide.
TERMINOLOGY
Gateway – A Z-Wave ® gateway, also referred to as a Z-Wave ®
controller, Z-Wave® main controller, Z-Wave® primary controller,
or Z-Wave® hub, etc., is a device that serves as a central hub for
a Z-Wave® smart home network. The term “ gateway” is used
in this document.
S button - The Z-Wave ® Service button, which is located on
Z-Wave® devices and is used for various functions such as in -
clusion (adding), exclusion (removing), and resetting the device
to its factory default settings. The term “ S button” is used in
this document.
Device – In this document, the term “Device” is used to refer to
the Shelly Wave device that is a subject of this guide.
ABOUT SHELL Y WAVE
Shelly Wave is a line of innovative microprocessor-managed
devices, which allow remote control of electric circuits with a
smartphone, tablet, PC, or home automation system. They work
on Z-Wave® wireless communication protocol, using a gateway,
which is required for a configuration of the Device. When the
gateway is connected to the internet, you can control Shelly
Wave devices remotely from anywhere. Shelly Wave devices
can be operated in any Z-Wave ® network with other Z-Wave ®
certified devices from other manufacturers. All mains operat -
ed nodes within the network will act as repeaters regardless
of vendor to increase reliability of the network. Devices are
designed to work with older generations of Z-Wave ® devices
and gateways.
ABOUT THE DEVICE
The Device is a 4-digital inputs module (5-24 V DC) that controls
other devices within the Z-Wave network. It enables manual ac-
tivation or deactivation of scenes with a push-button.
INSTALLATION INSTRUCTIONS
The Device can be retrofitted into a standard in-wall console,
behind switches or other places with limited space.
For the installation instructions, refer to the wiring schemes
(Fig. 1-2) in this user guide.
⚠WARNING! Risk of electric shock. Make sure that after ...