WBR3S Reset & Teardown (FCC ID 2ANDL-WBR3S)
Factory reset and internal photos for Tuya Global WBR3S. Tuya / Smart Life smart plug.
January 15, 2026
•
8 read
Before you buy the Tuya Global WBR3S, check what's inside.
The WBR3S is a low-power embedded module by Tuya, featuring integrated WiFi and Bluetooth connectivity driven by the RTL8720CS chipset. It is designed for developers to build smart home devices and appliances.
⚠️ NOTE: Ensure the module is handled and powered within the specified 3.0 to 3.6V range to prevent damage.
Quick Specs
- Manufacturer: Tuya Global
- Model: WBR3S
- Protocol: WiFi
- Chipset: Realtek RTL8720
- Ecosystem: Tuya / Smart Life
- App: Smart Life
🔧 Geek Corner (Flashing Info)
- Chipset: RTL8720CS
- Flashable: ❌ No
- Info: The provided documentation and common knowledge about Tuya's RTL8720CS modules indicate they are generally not easily flashable with custom firmware like Tasmota without significant hardware modification or specific exploits, and the original data states 'Not Flashable'.
User Manual
Scanned pages from the official user manual:


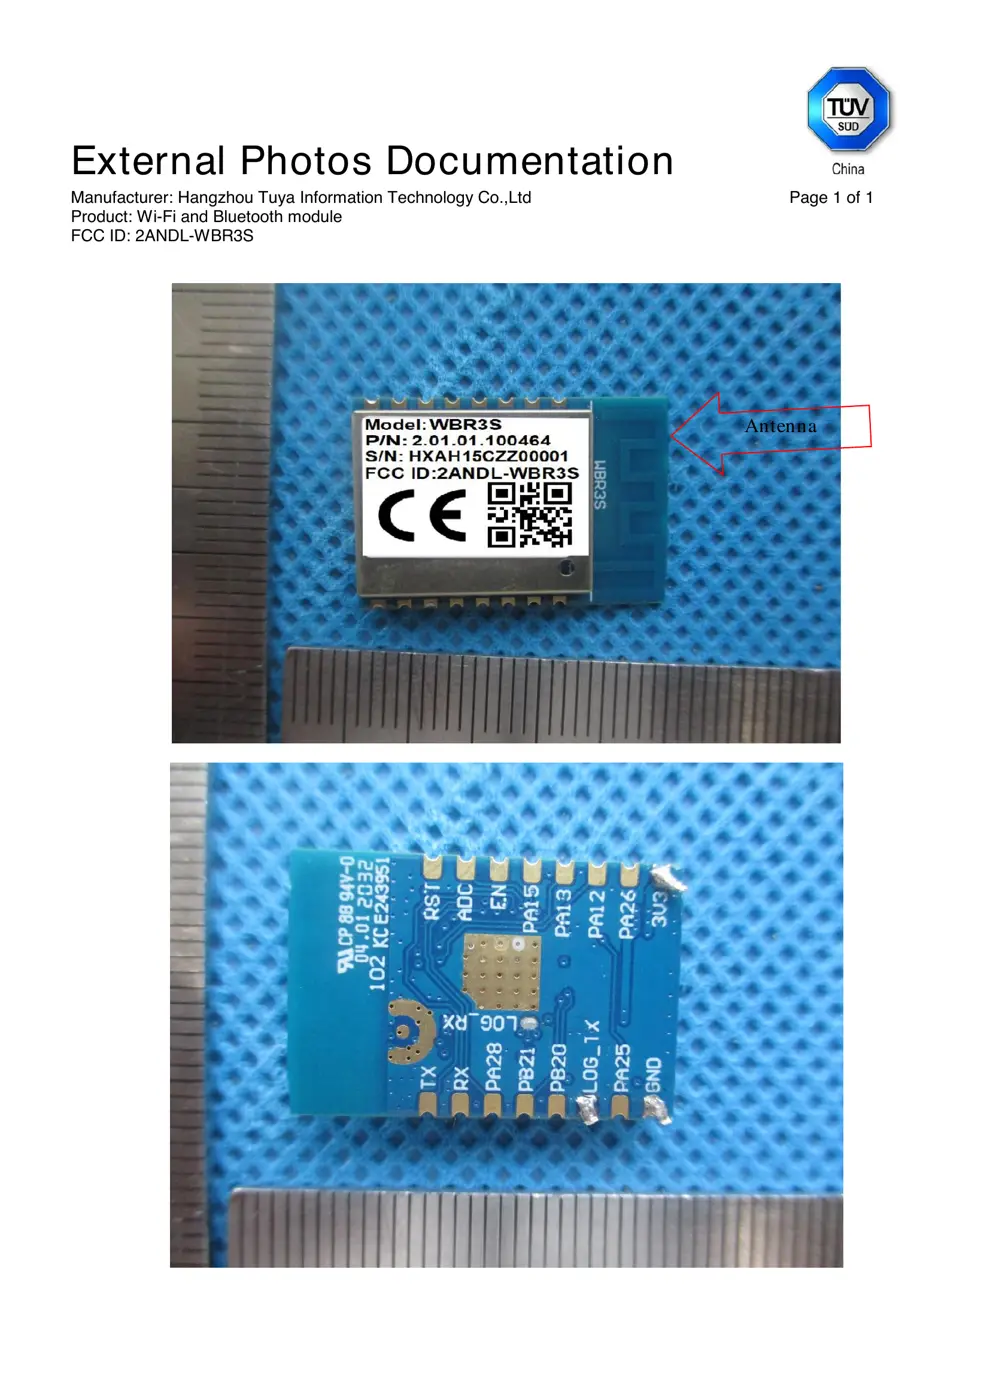
External Photos
Photos of the device exterior:
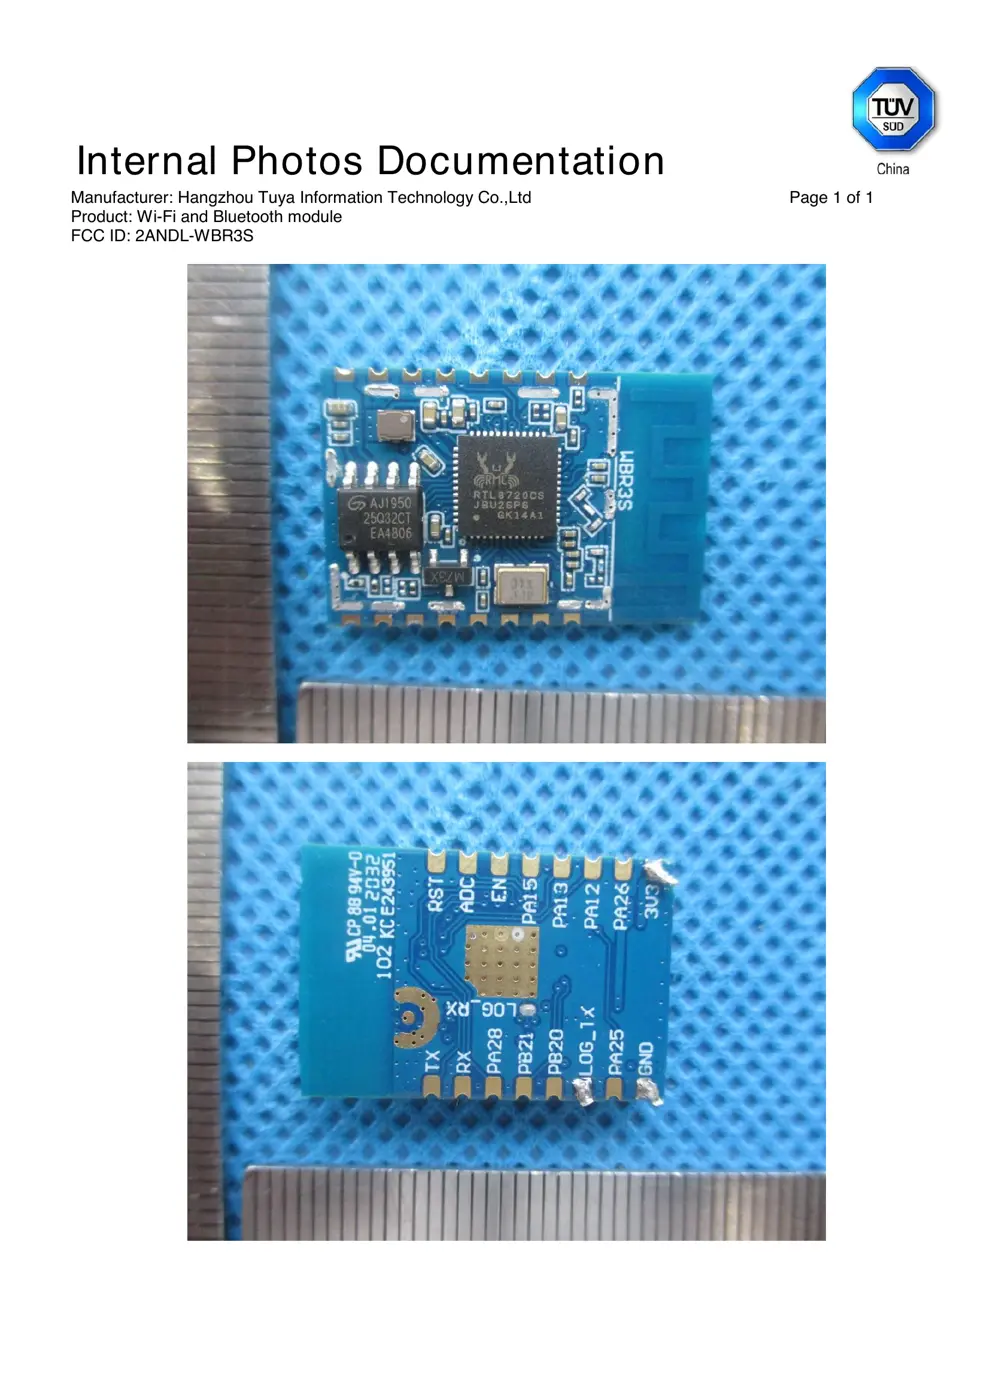
Internal Photos
Teardown photos showing the PCB and components:
Verdict
The WBR3S is a WiFi device from the Tuya / Smart Life ecosystem.
📄 Click to view full text manual (SEO)
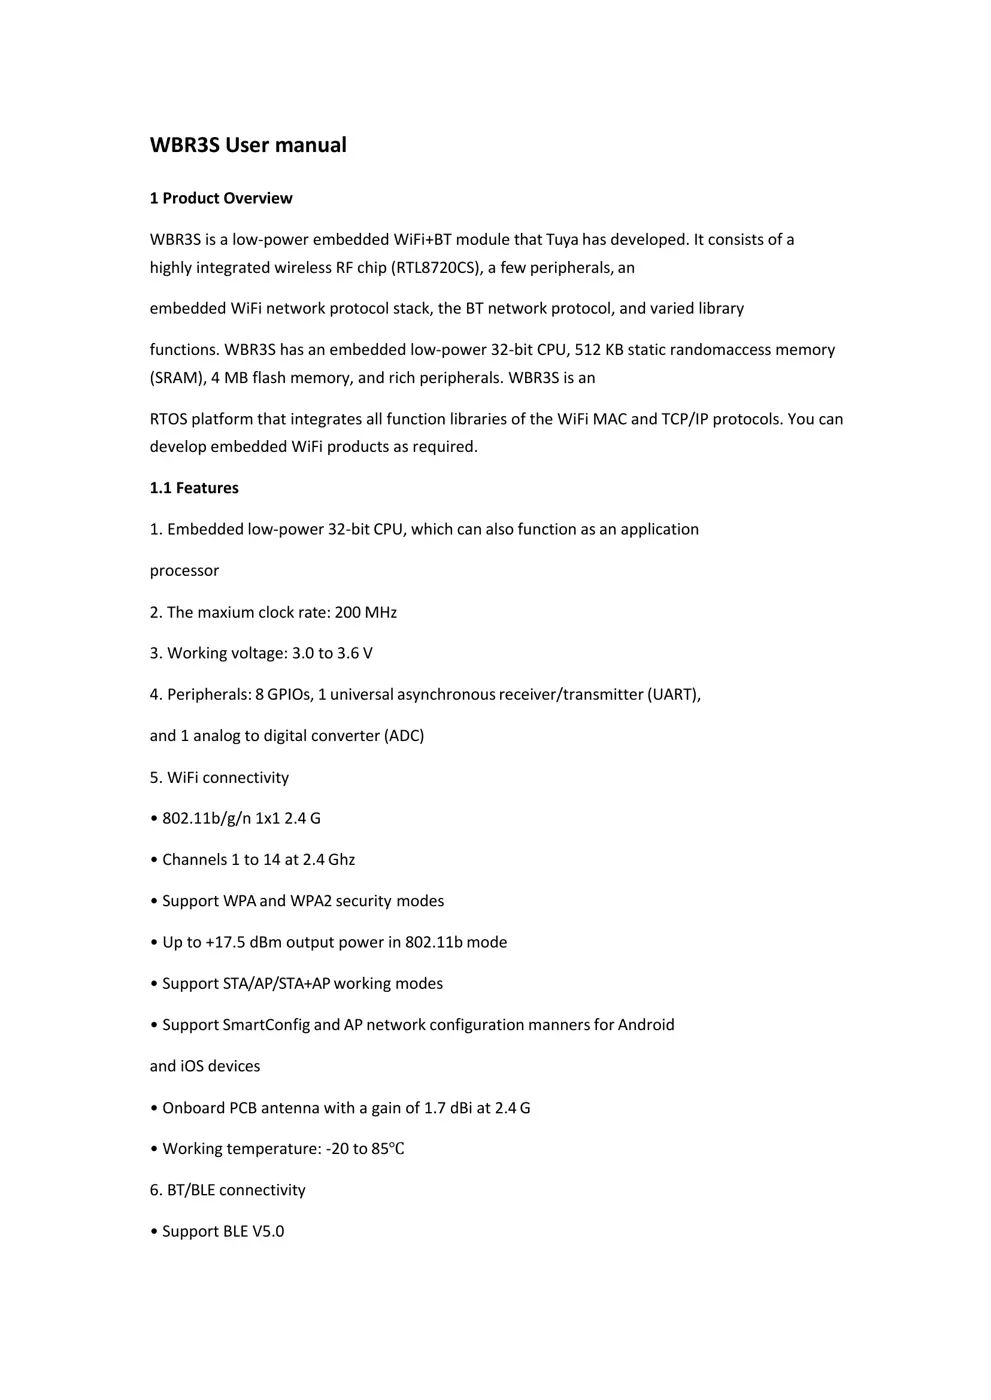
WBR3S User manual
1 Product Overview
WBR3S is a low-power embedded WiFi+BT module that Tuya has developed. It consists of a
highly integrated wireless RF chip (RTL8720CS), a few peripherals, an
embedded WiFi network protocol stack, the BT network protocol, and varied library
functions. WBR3S has an embedded low-power 32-bit CPU, 512 KB static randomaccess memory
(SRAM), 4 MB flash memory, and rich peripherals. WBR3S is an
RTOS platform that integrates all function libraries of the WiFi MAC and TCP/IP protocols. You can
develop embedded WiFi products as required.
1.1 Features
1. Embedded low-power 32-bit CPU, which can also function as an application
processor
2. The maxium clock rate: 200 MHz
3. Working voltage: 3.0 to 3.6 V
4. Peripherals: 8 GPIOs, 1 universal asynchronous receiver/transmitter (UART),
and 1 analog to digital converter (ADC)
5. WiFi connectivity
• 802.11b/g/n 1x1 2.4 G
• Channels 1 to 14 at 2.4 Ghz
• Support WPA and WPA2 security modes
• Up to +17.5 dBm output power in 802.11b mode
• Support STA/AP/STA+AP working modes
• Support SmartConfig and AP network configuration manners for Android
and iOS devices
• Onboard PCB antenna with a gain of 1.7 dBi at 2.4 G
• Working temperature: -20 to 85℃
6. BT/BLE connectivity
• Support BLE V5.0
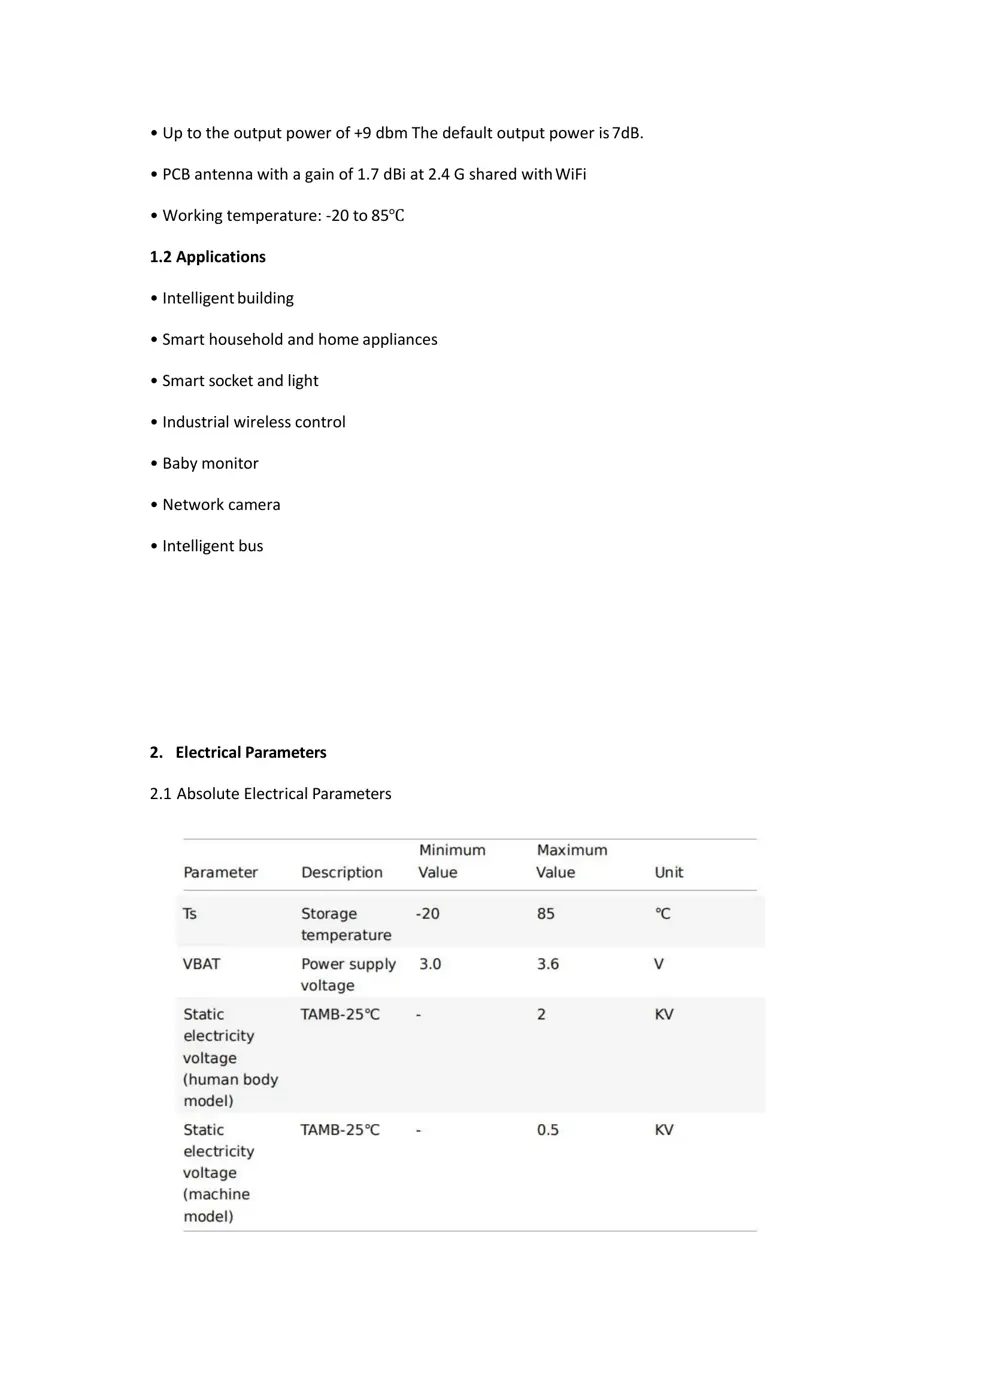
• Up to the output power of +9 dbm The default output power is 7dB.
• PCB antenna with a gain of 1.7 dBi at 2.4 G shared with WiFi
• Working temperature: -20 to 85℃
1.2 Applications
• Intelligent building
• Smart household and home appliances
• Smart socket and light
• Industrial wireless control
• Baby monitor
• Network camera
• Intelligent bus
2. Electrical Parameters
2.1 Absolute Electrical Parameters
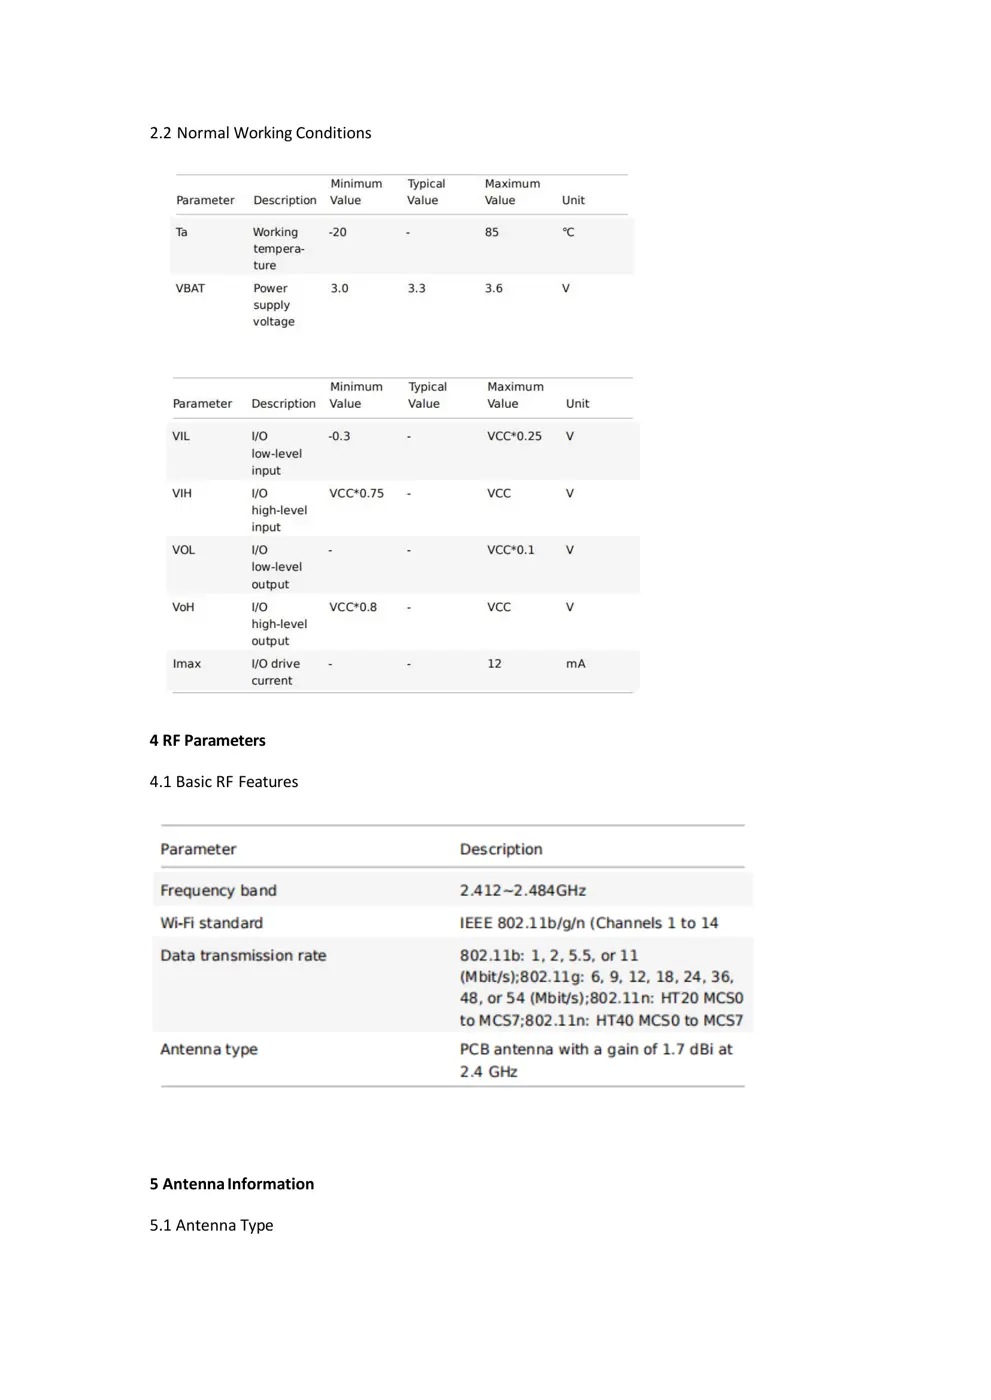
2.2 Normal Working Conditions
4 RF Parameters
4.1 Basic RF Features
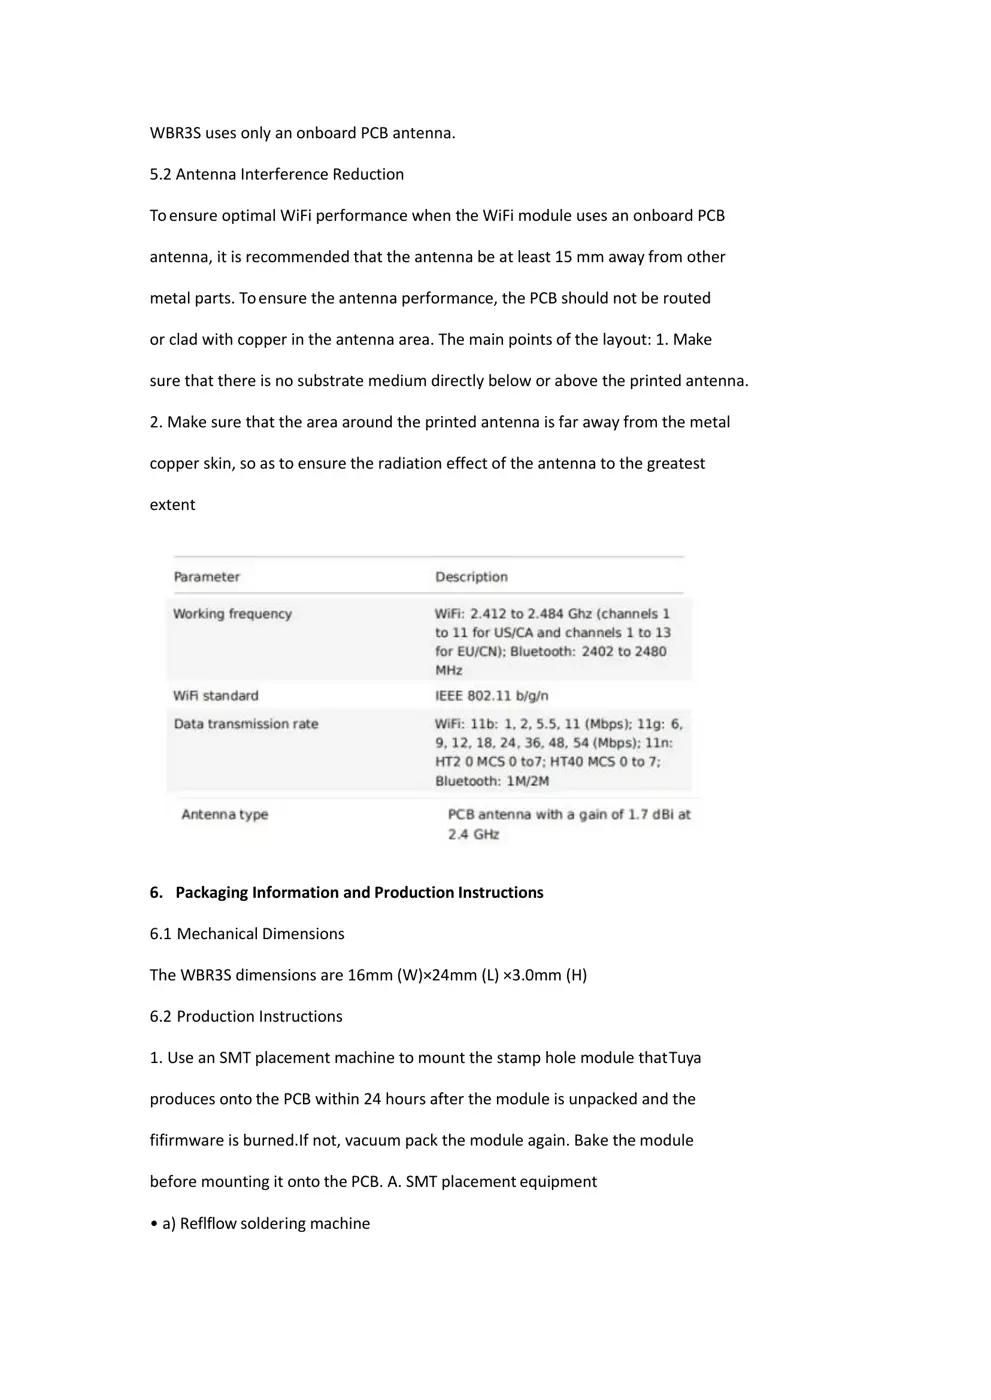
5 Antenna Information
5.1 Antenna Type
WBR3S uses only an onboard PCB antenna.
5.2 Antenna Interference Reduction
To ensure optimal WiFi performance when the WiFi module uses an onboard PCB
antenna, it is recommended that the antenna be at least 15 mm away from other
metal parts. To ensure the antenna performance, the PCB should not be routed
or clad with copper in the antenna area. The main points of the layout: 1. Make
sure that there is no substrate medium directly below or above the printed antenna.
2. Make sure that the area around the printed antenna is far away from the metal
copper skin, so as to ensure the radiation effect of the antenna to the greatest
extent
6. Packaging Information and Production Instructions
6.1 Mechanical Dimensions
The WBR3S dimensions are 16mm (W)×24mm (L) ×3.0mm (H)
6.2 Production Instructions
1. Use an SMT placement machine to mount the stamp hole module that Tuya
produces onto the PCB within 24 hours after the module is unpacked and the
fifirmware is burned.If not, vacuum pack the module again. Bake the module
before mounting it onto the PCB. A. SMT placement equipment
• a) Reflflow soldering mach...