4CH Reset & Teardown (FCC ID 2AE2J-4CH)
Factory reset and internal photos for Shelly (Allterco) 4CH. Shelly smart plug.
January 15, 2026
•
9 read

Before you buy the Shelly (Allterco) 4CH, check what's inside.
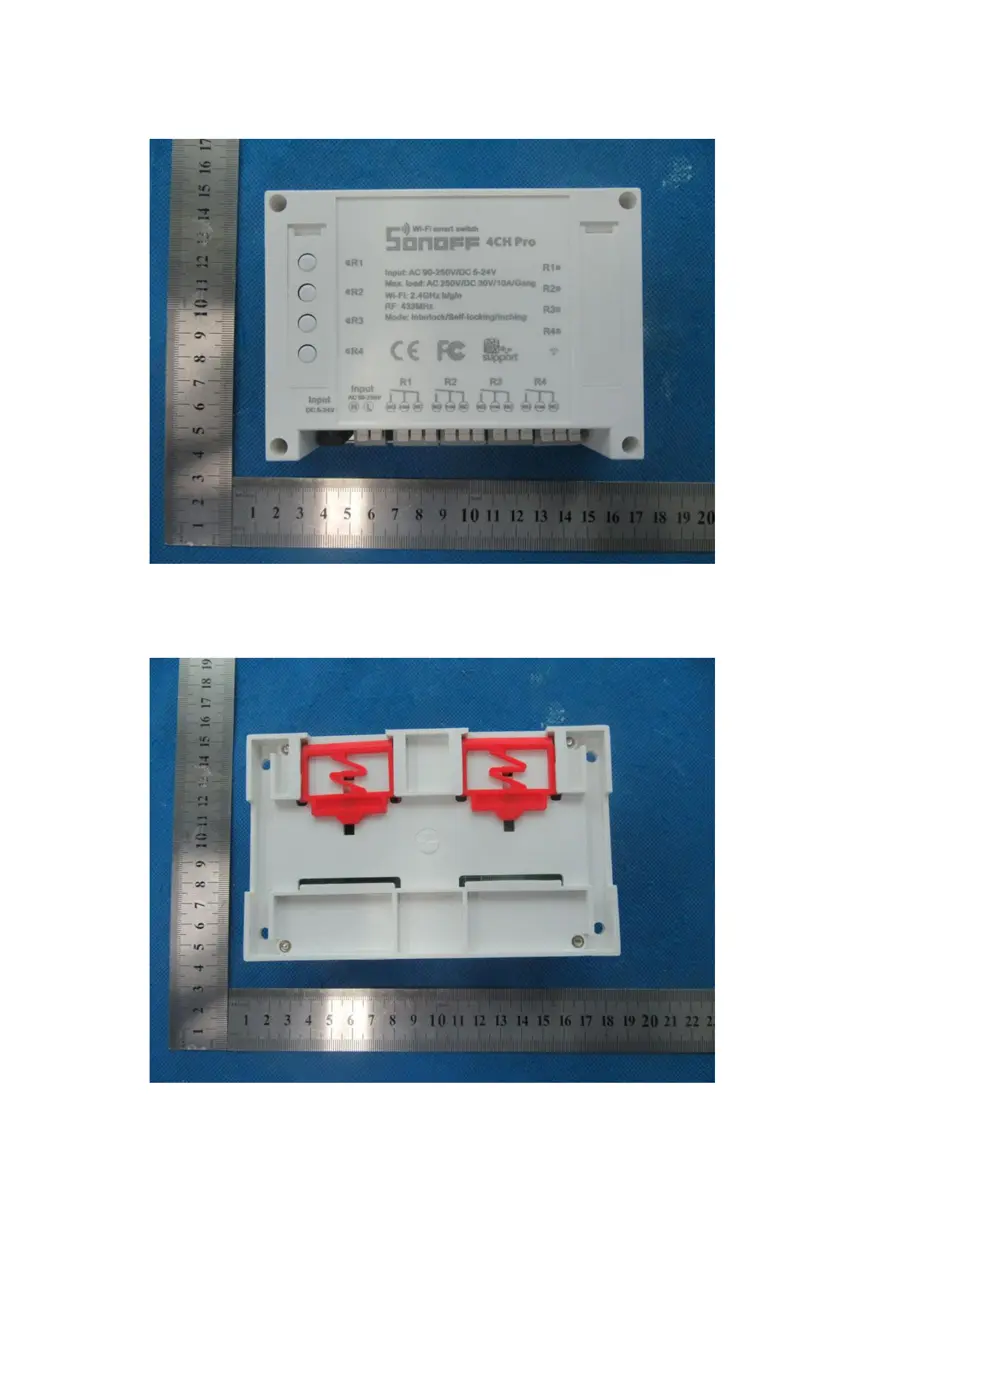
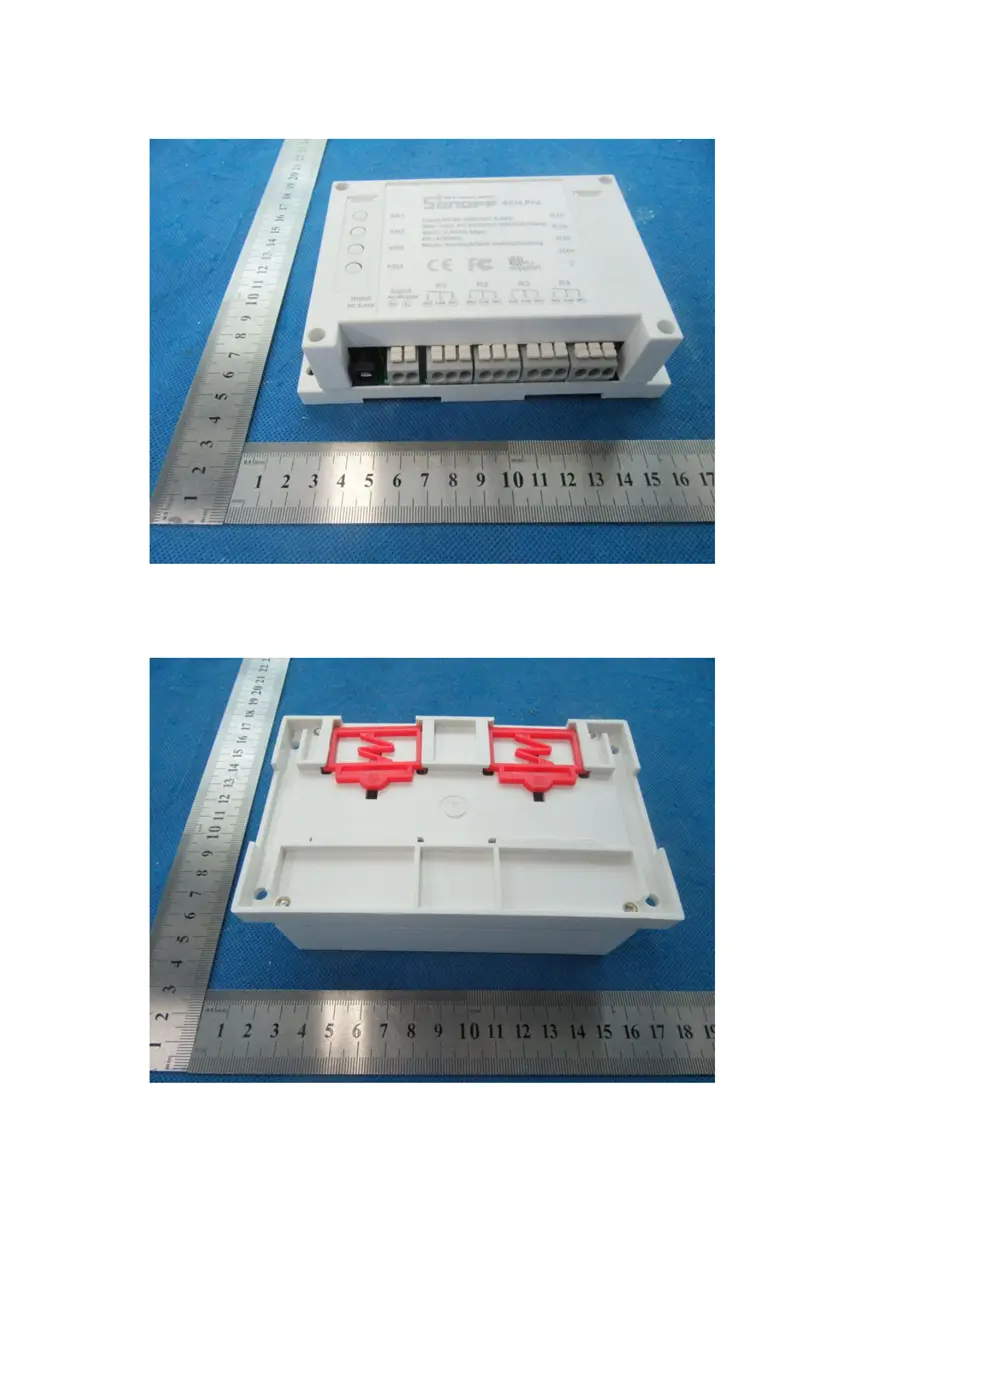
The Sonoff 4CH Pro is a versatile 4-channel WiFi switch designed for DIN rail mounting. It offers independent control over four connected appliances and supports multiple operating modes like self-locking, inching, and interlock.
⚠️ NOTE: Disconnect Mains power supply before performing any wiring or installation.
Quick Specs
- Manufacturer: Shelly (Allterco)
- Model: 4CH
- Protocol: WiFi
- Chipset: ESP32
- Ecosystem: Shelly
- App: Shelly App
🔧 Geek Corner (Flashing Info)
- Chipset: ESP32
- Flashable: ✅ Yes
- Info: Uses ESP32 chipset, known to be flashable with custom firmware like Tasmota or ESPHome.
User Manual
Scanned pages from the official user manual:
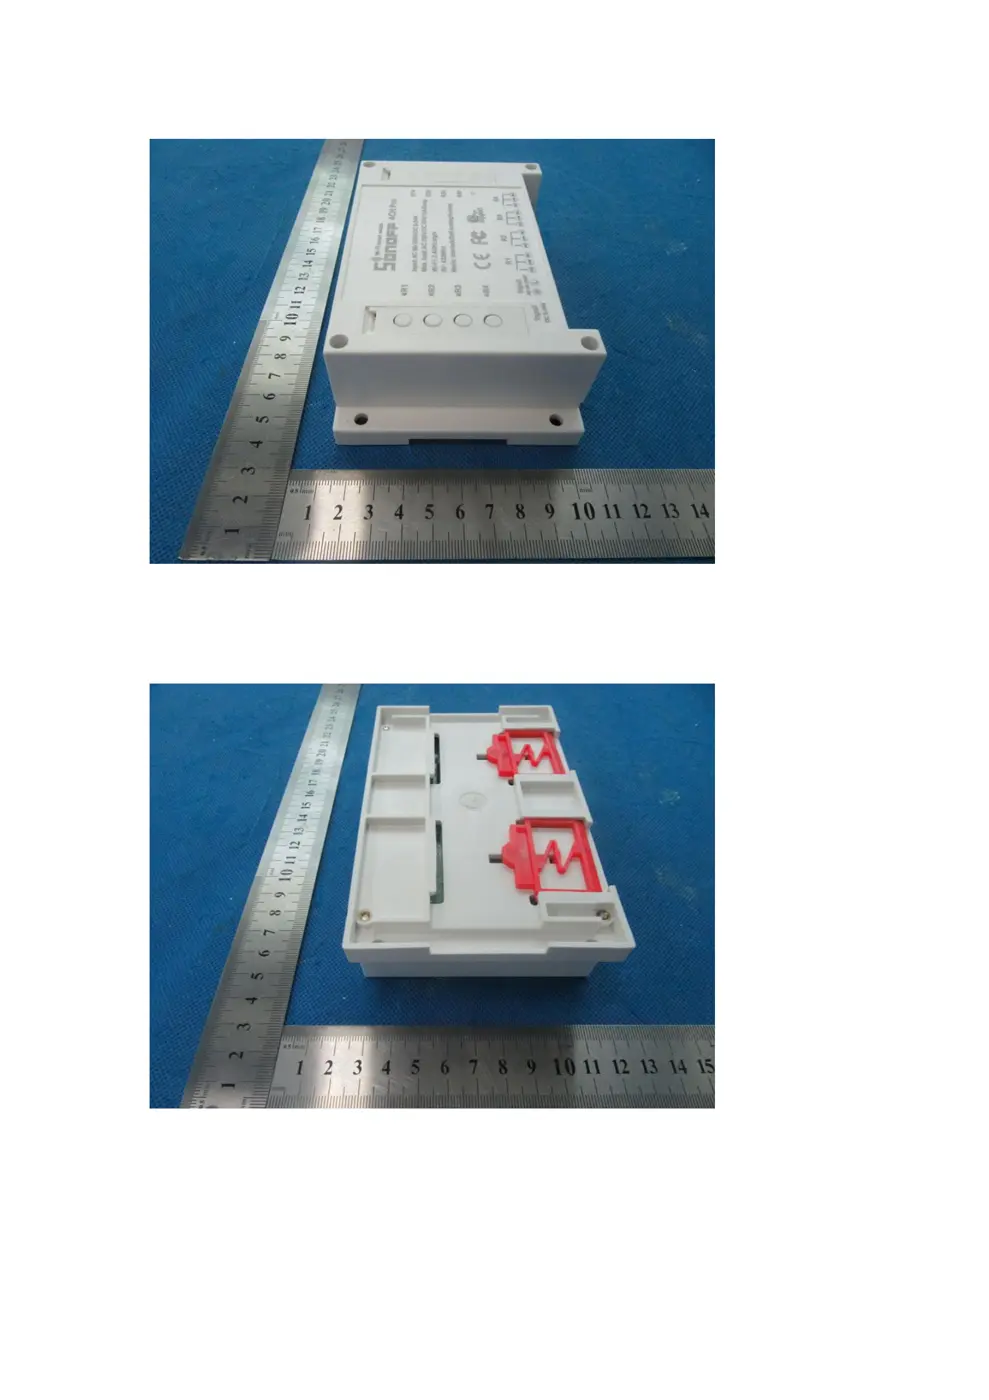
External Photos
Photos of the device exterior:
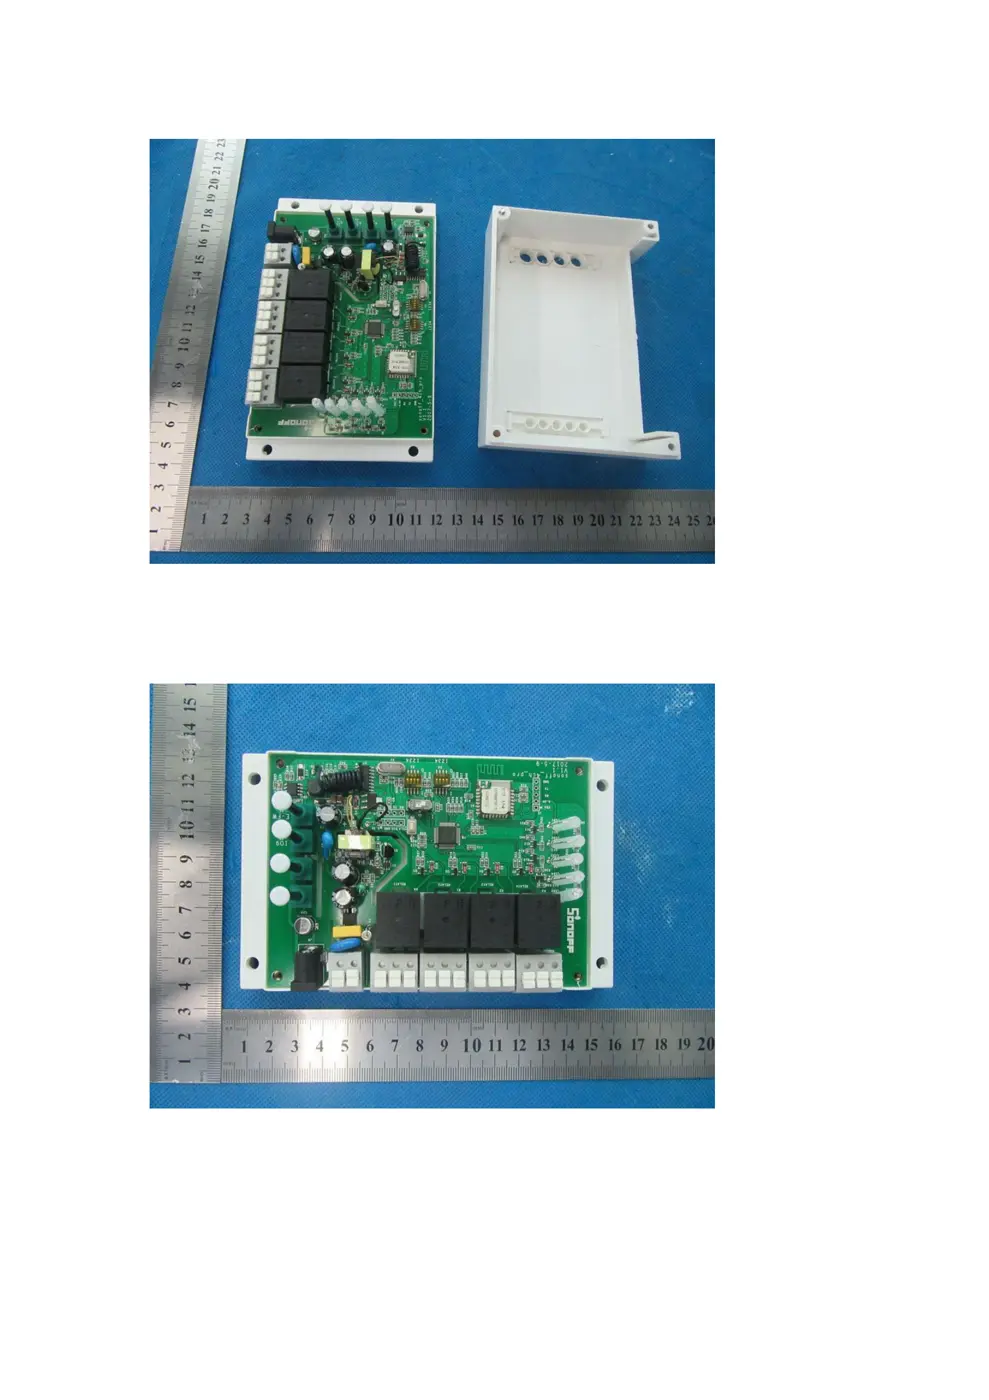
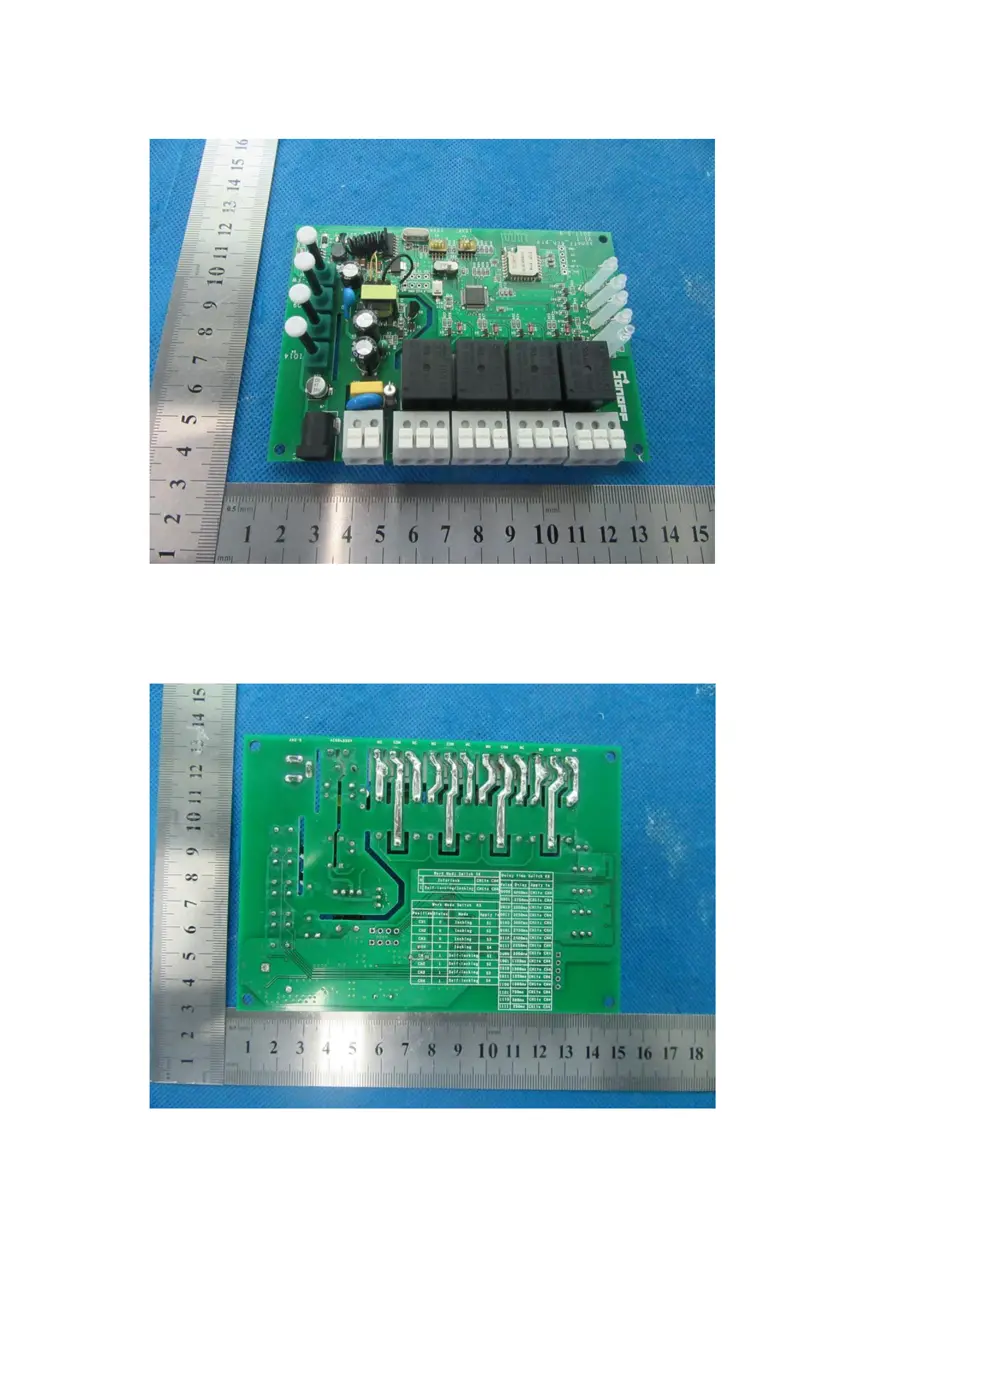
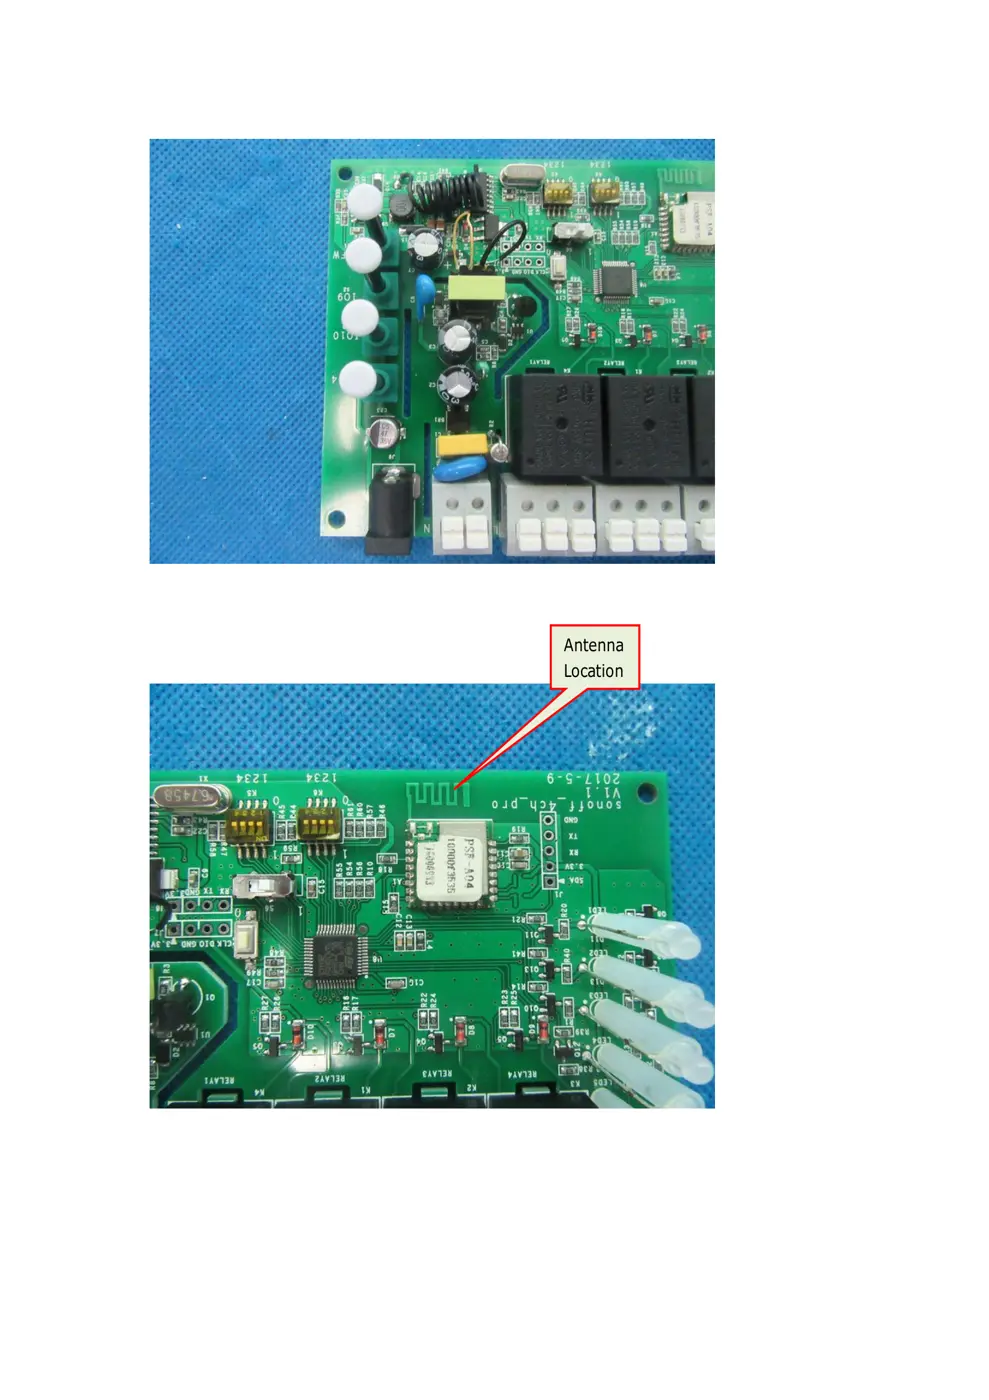
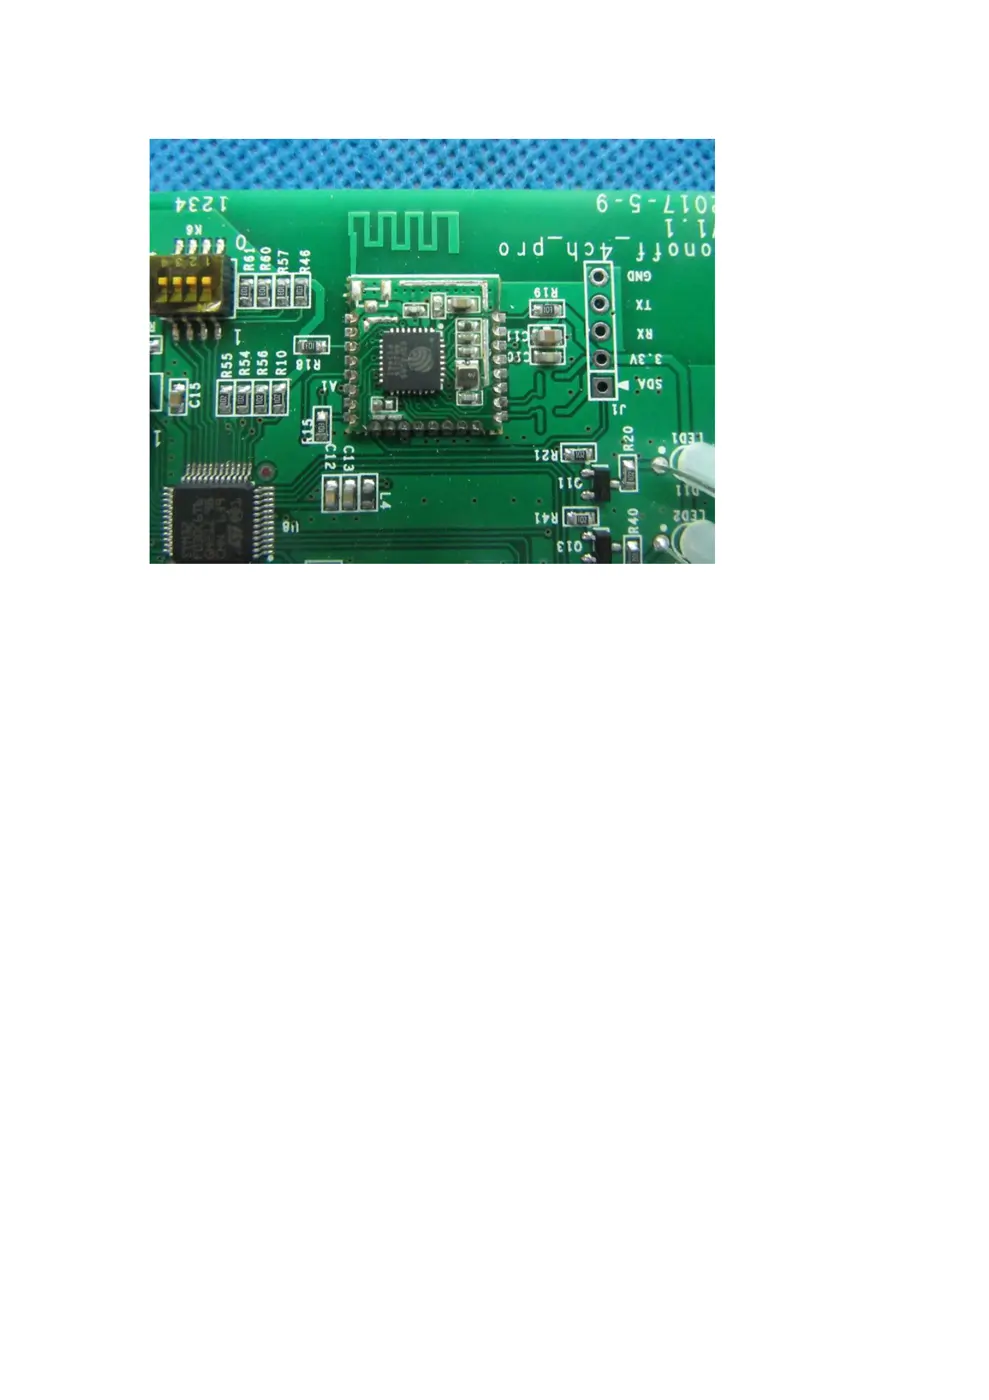
Internal Photos
Teardown photos showing the PCB and components:
Verdict
The 4CH is a WiFi device from the Shelly ecosystem.
📄 Click to view full text manual (SEO)
Hi, welcome to use Sonoff 4CH Pro! Sonoff 4CH Pro is a 4 channel (4-way) din rail mounting 433MHz RF remote WiFi
switch that can independently control the 4 home appliances. It supports switching among 3 working modes:
inching/interlock/self-locking mode.
Power supply: 90-250v AC(50/60Hz)/5-24v DC. Max current: 10A/gang.
1. Download “eWeLink” app.
Search “eWeLink” in APP Store for iOS version or Google play for Android version.
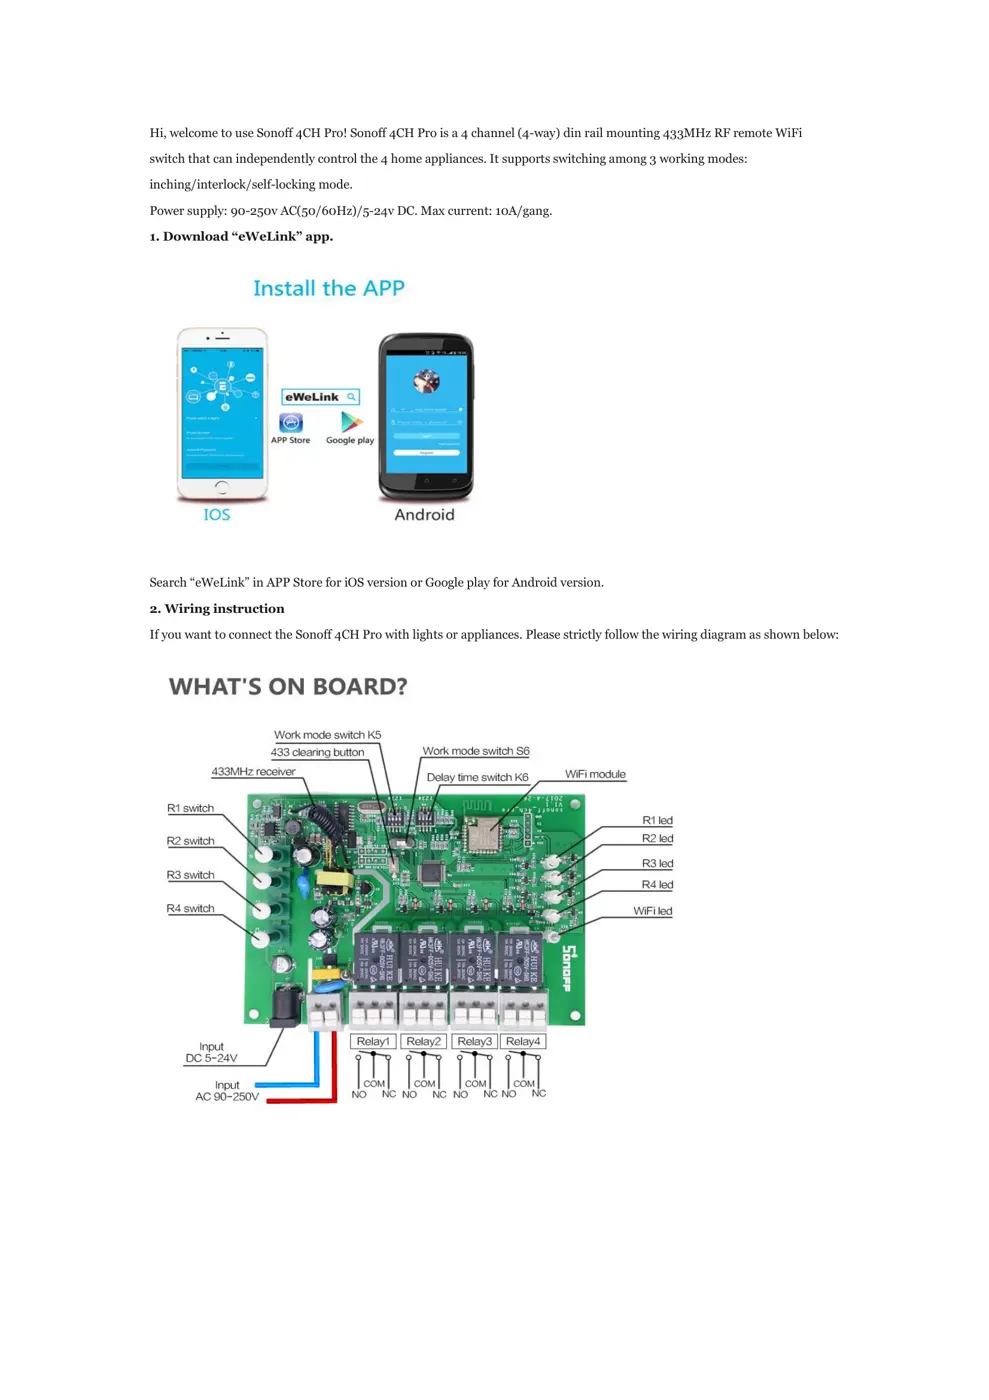
2. Wiring instruction
If you want to connect the Sonoff 4CH Pro with lights or appliances. Please strictly follow the wiring diagram as shown below:
You may choose to power up by 5-24V DC or by 90-250V AC. Each relay without voltage output.
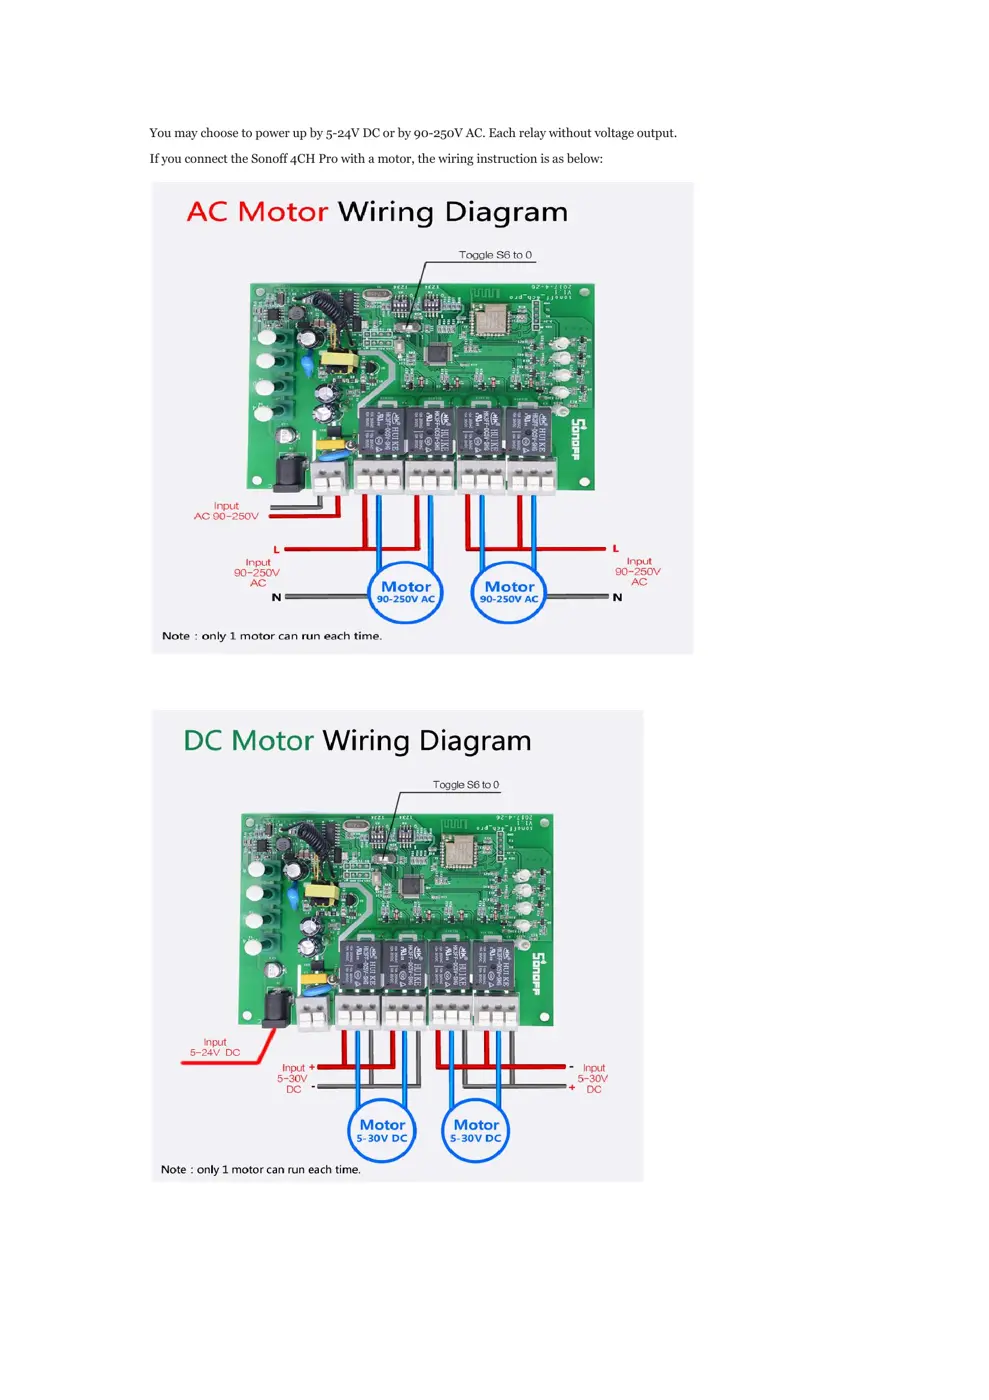
If you connect the Sonoff 4CH Pro with a motor, the wiring instruction is as below:
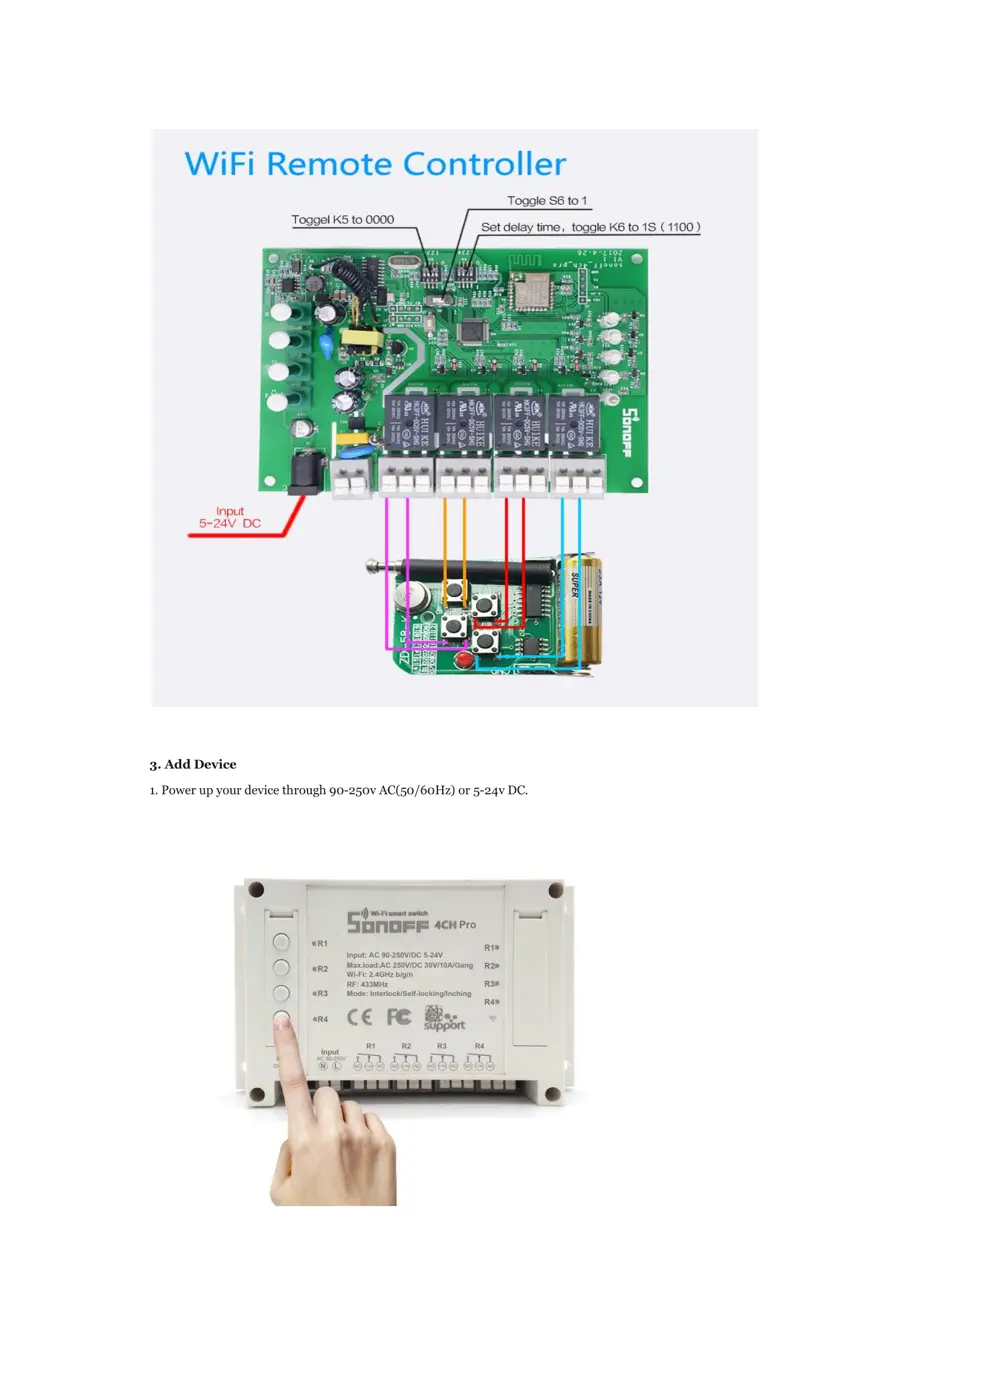
3. Add Device
1. Power up your device through 90-250v AC(50/60Hz) or 5-24v DC.
2. Press and hold one of the 4 ON/OFF buttons for 7 seconds until the wifi LED fast blinks 3 times and repeat.
3. Click the “+” icon on eWeLink to search device, click next.
For iOS users, they will see two pairing method icons to select, here please select the 2nd icon.
The App will auto-search the device.
4. Enter your home SSID & password:
4.1 If your WiFi doesn’t have a password, keep it blank.
4.2 Now eWeLink only support 2.4G wifi communication protocol, 5G-WiFi-router is not supported
5. Next, the device will be registered by eWelink and add it to your account,it takes 1-3 minutes.
6. Name the device to complete.
7. Maybe the device is “Offline” on eWeLink, for the device needs 1 minute to connect to your router and server. When the
wifi LED is on, the device is “Online”.
3. Working Mode Settings
You can set the switch among 3 working modes: inching/interlock/self-locking mode.
1. In self-locking mode, you can turn on/off the 4 connected devices independently. For example, if you turn on CH1,
connected device keeps on. If you turn off CH2, connected device keeps off.
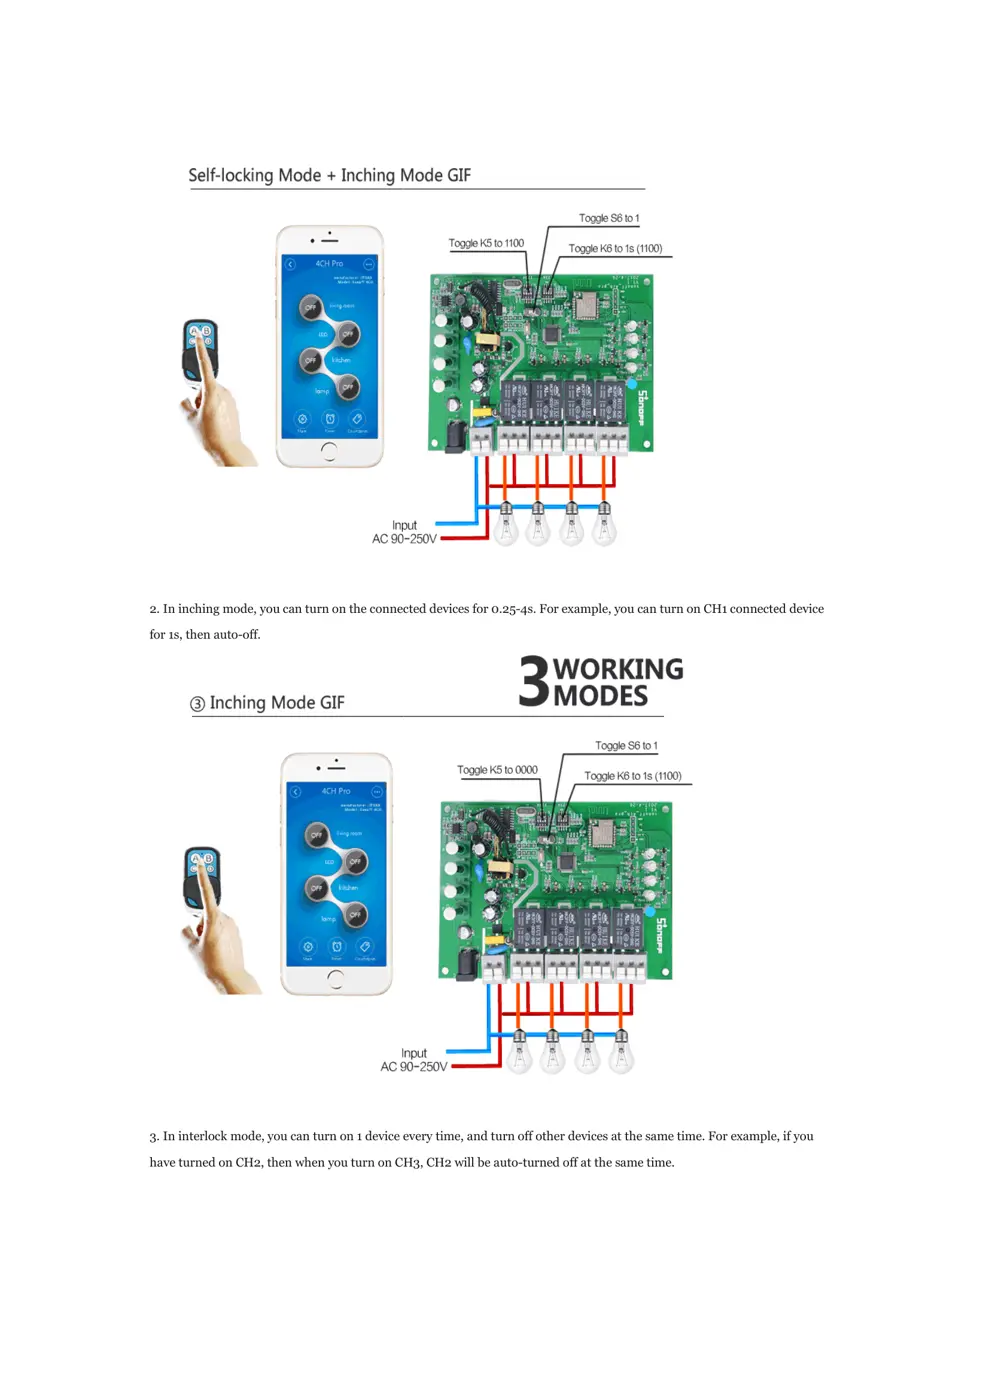
2. In inching mode, you can turn on the connected devices for 0.25
for 1s, then auto-off.
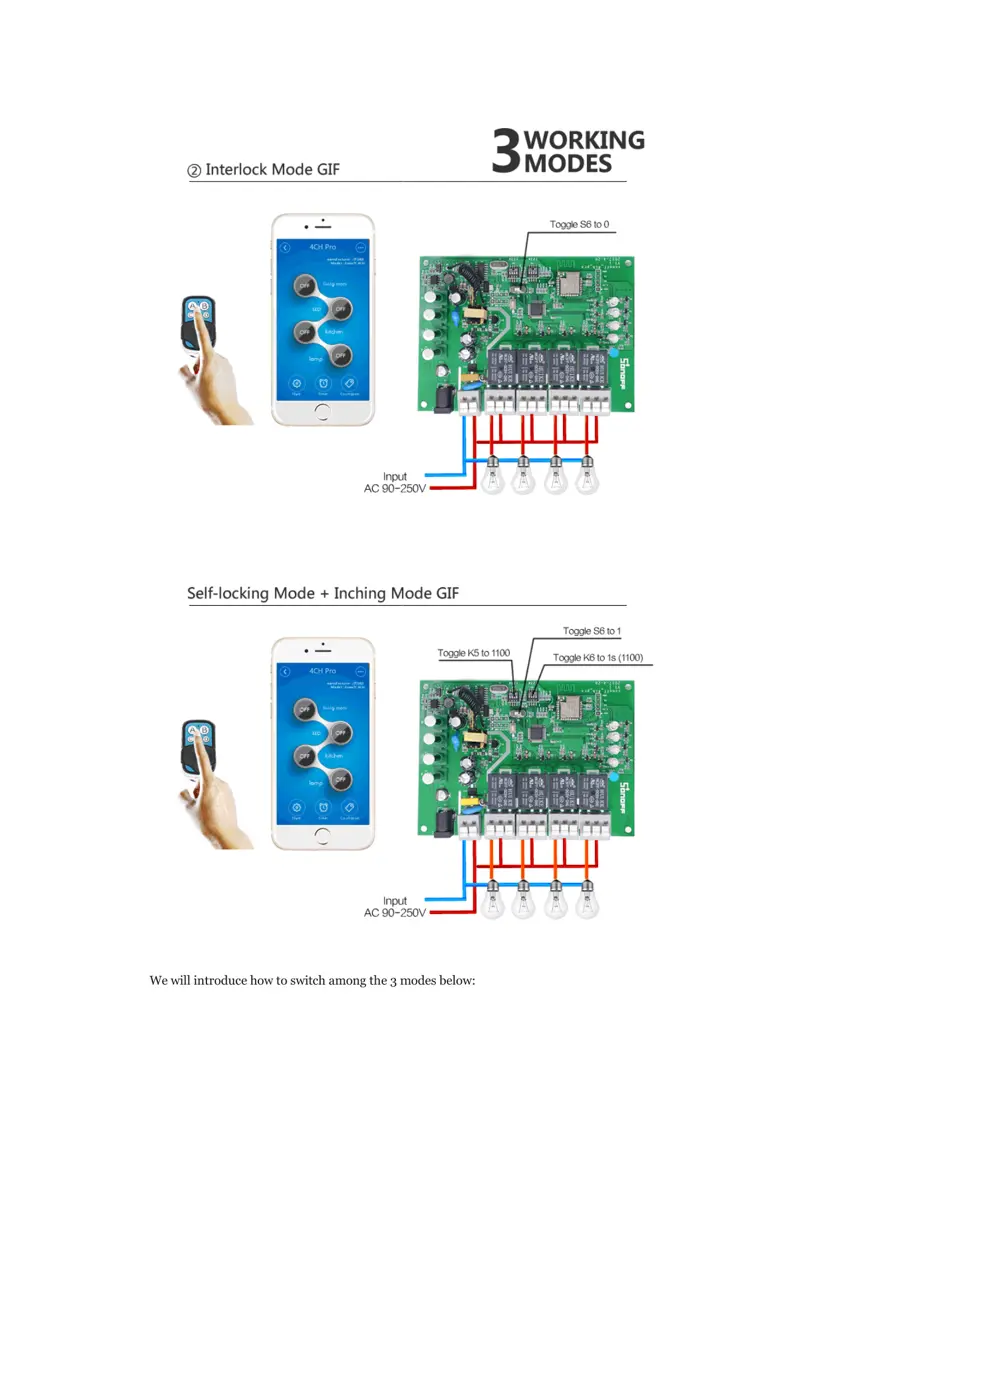
3. In interlock mode, you can turn on 1 device every time, and turn off other devices at the same time. For example, if you
have turned on CH2, then when you turn on CH3, CH2 will be auto
can turn on the connected devices for 0.25-4s. For example, you can turn on CH1 connected device
3. In interlock mode, you can turn on 1 device every time, and turn off other devices at the same time. For example, if you
d on CH2, then when you turn on CH3, CH2 will be auto-turned off at the same time.
4s. For example, you can turn on CH1 connected device
3. In interlock mode, you can turn on 1 device every time, and turn off other devices at the same time. For example, if you
We will introduce how to switch among the 3 modes below:
We will introduce how to switch among the 3 modes below:
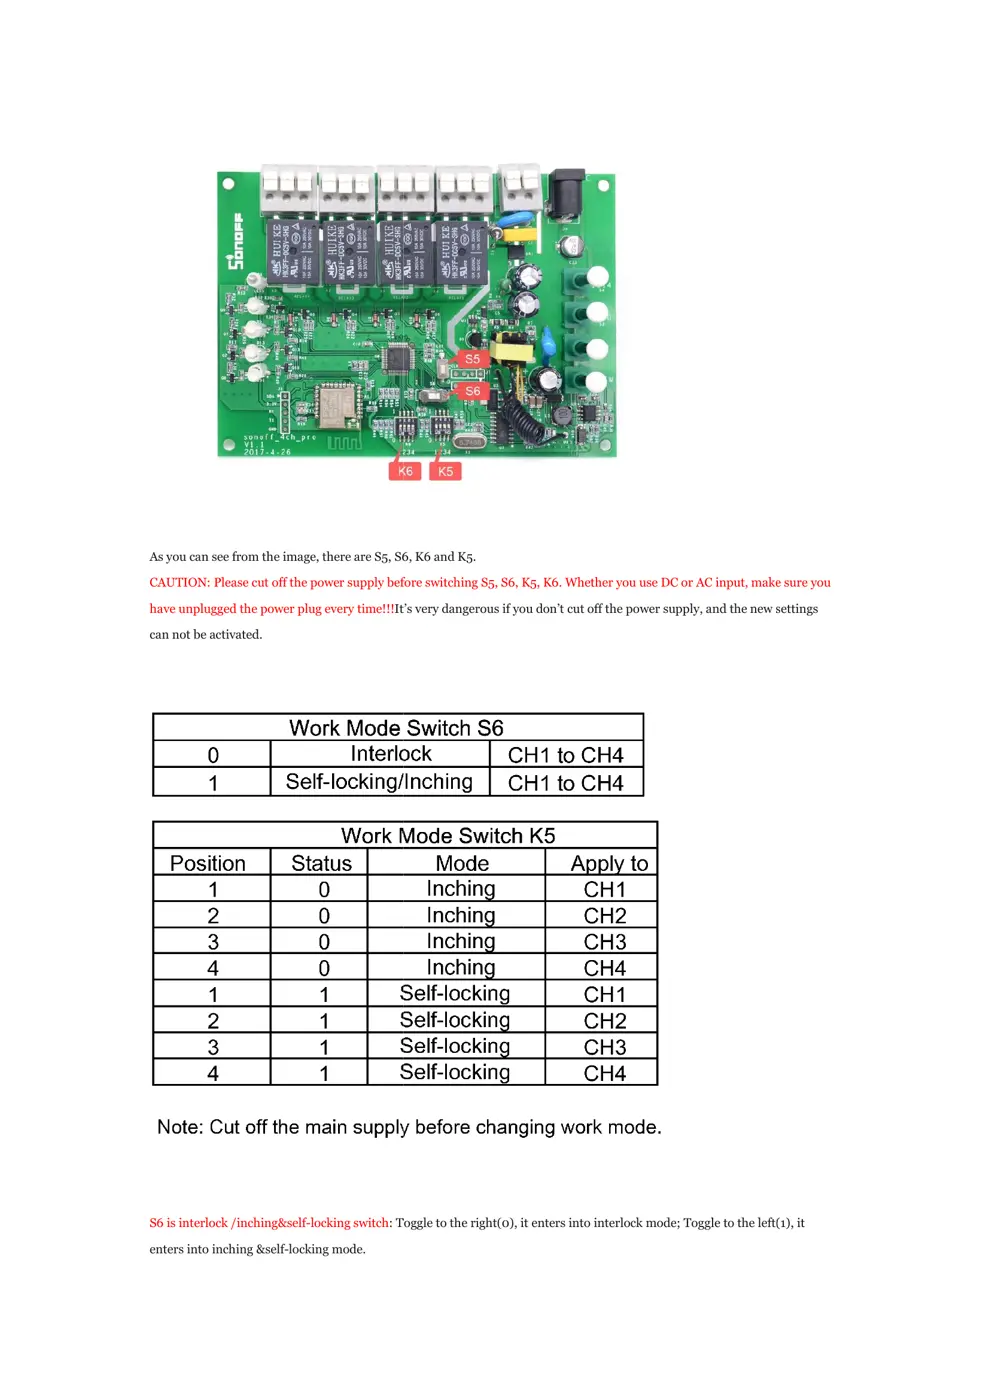
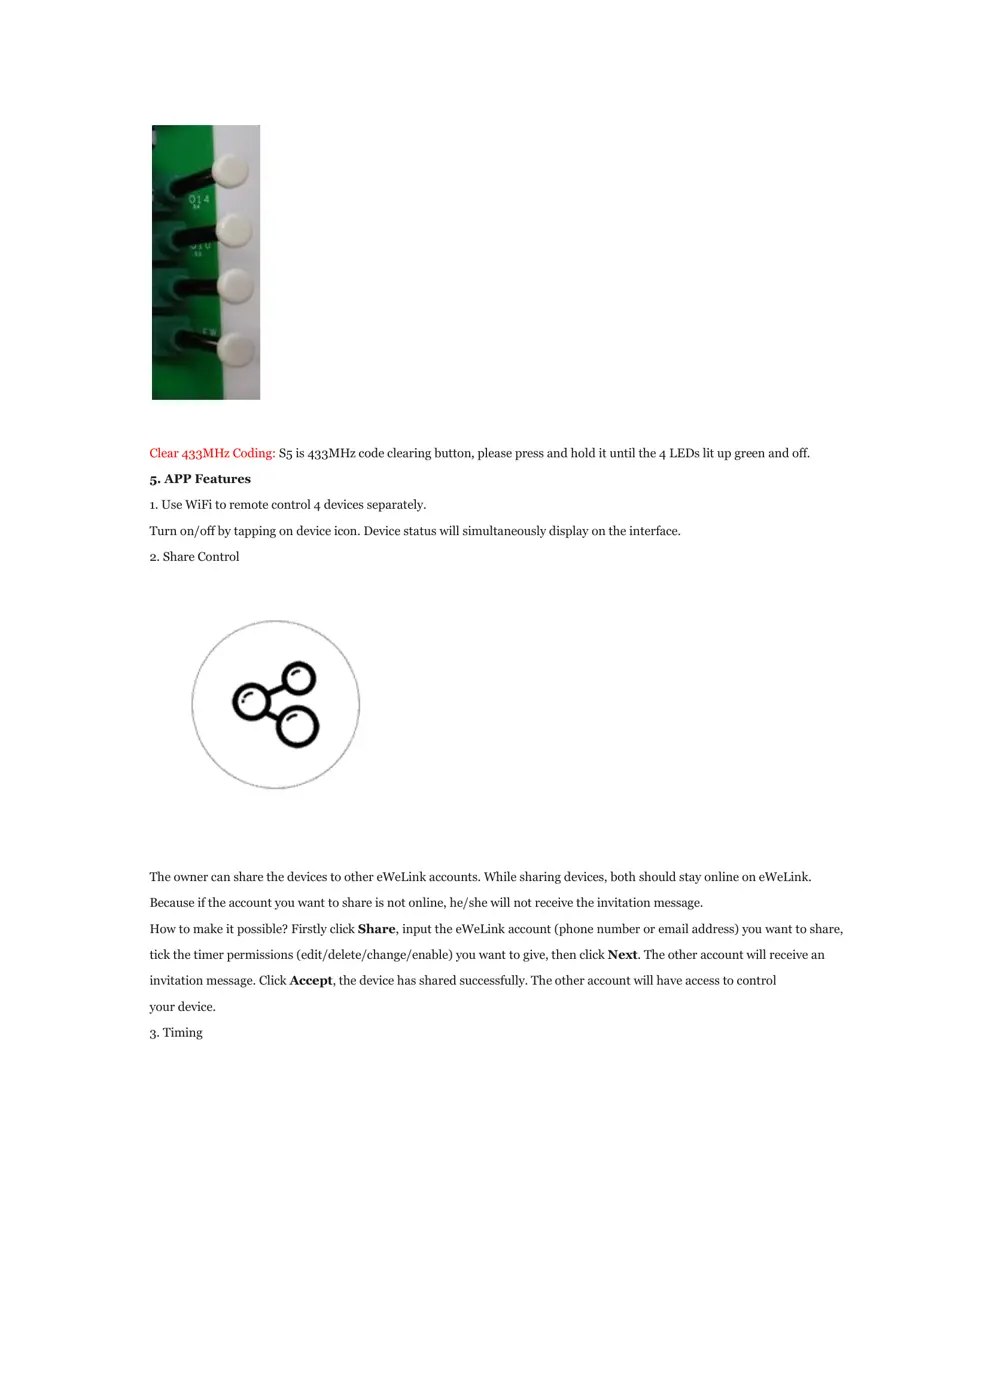
As you can see from the image, there are S5, S6, K6 and K5.
CAUTION: Please cut off the power supply before
have unplugged the power plug every time!!...