SHELLYBLUDW Reset & Teardown (FCC ID 2BDC6-SHELLYBLUDW)
Factory reset and internal photos for Shelly Group SHELLYBLUDW. Shelly smart plug.
Before you buy the Shelly Group SHELLYBLUDW, check what's inside.
The Shelly BLU Door/Window is a smart sensor designed to detect the open/closed state of doors and windows using Bluetooth Low Energy. It also incorporates an inclination and light sensor for enhanced environmental monitoring.
ℹ️ Note: This is a battery-powered device. Remove batteries before opening.
⚠️ NOTE: Ensure correct battery polarity and keep away from liquids and moisture.
Quick Specs
- Manufacturer: Shelly Group
- Model: SHELLYBLUDW
- Protocol: Bluetooth
- Chipset: ESP32
- Ecosystem: Shelly
- App: Shelly App
🔧 Geek Corner (Flashing Info)
- Chipset: ESP32
- Flashable: ❌ No
- Info: Shelly devices typically use proprietary firmware and are not designed for user flashing with alternative firmware like Tasmota or ESPHome.
Reset Guide
Press and hold the device button for 10 sec.
User Manual
Scanned pages from the official user manual:
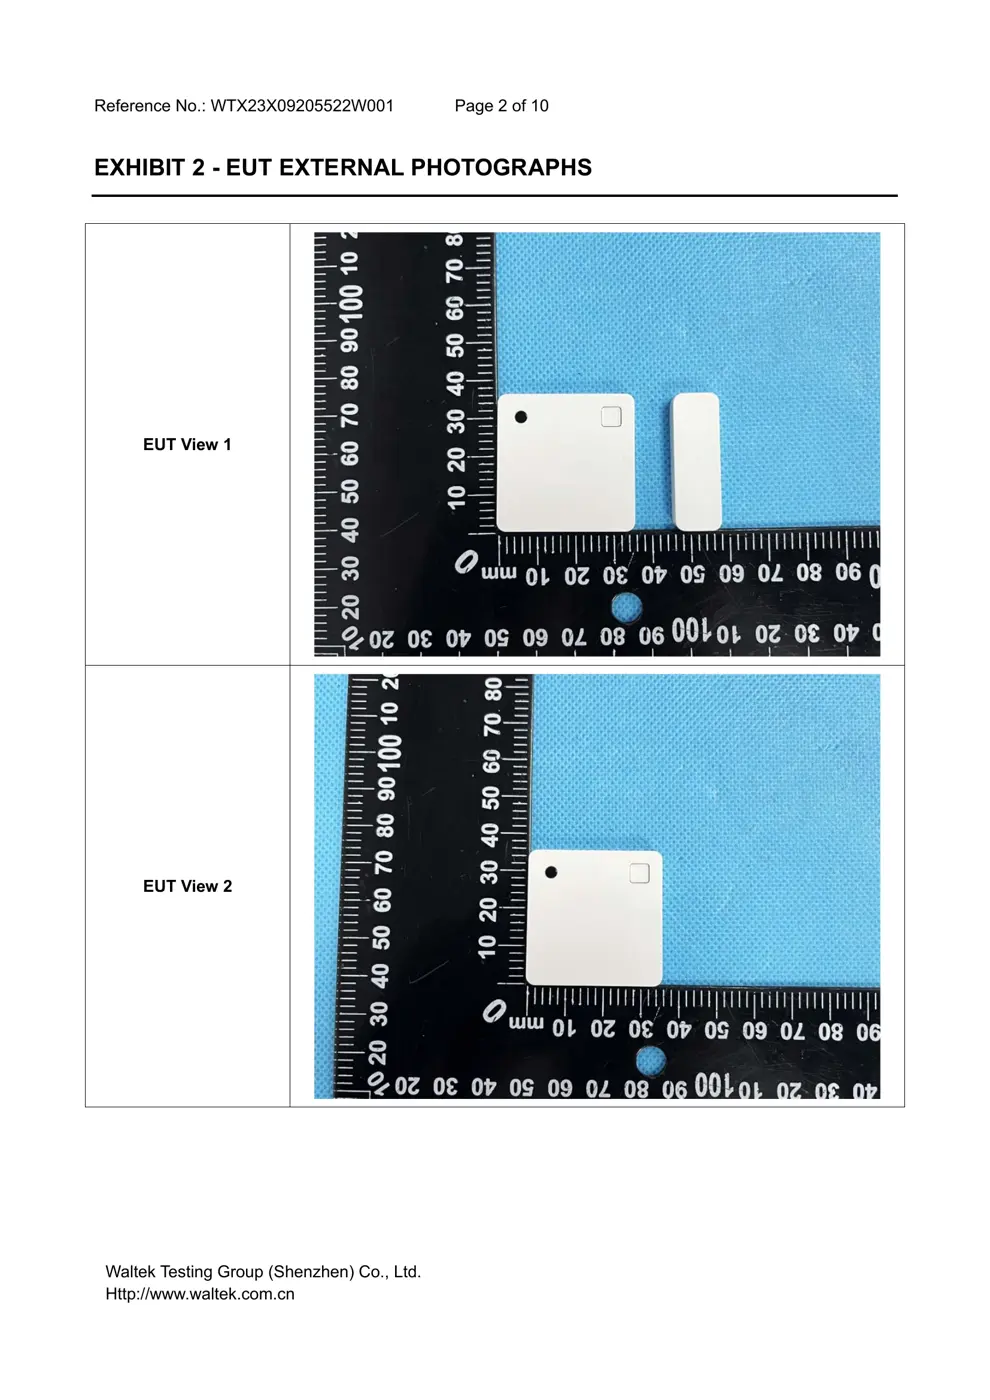
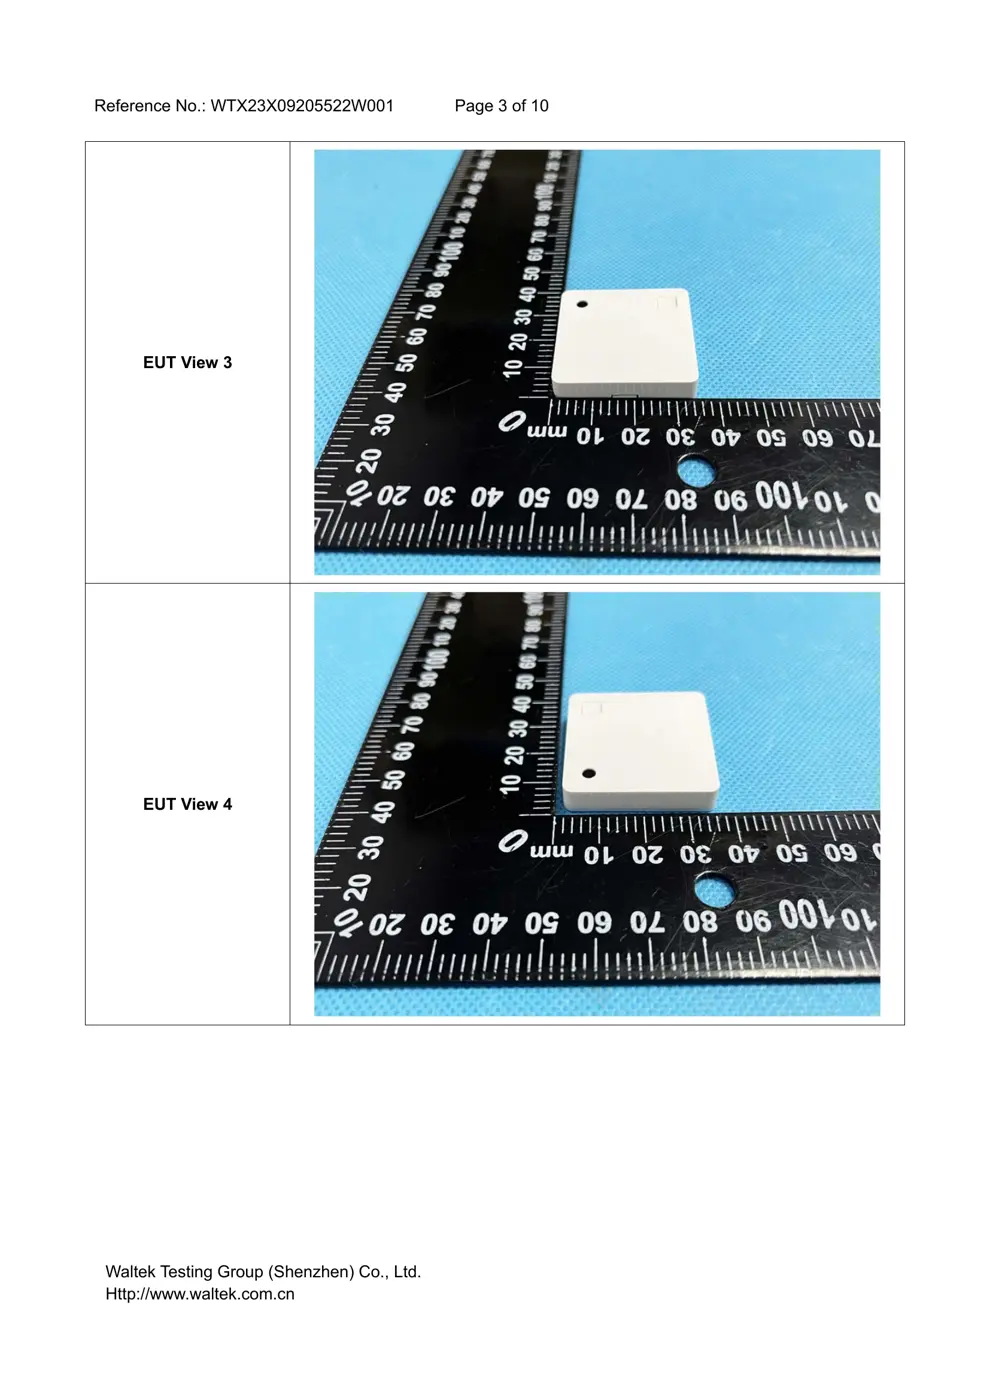
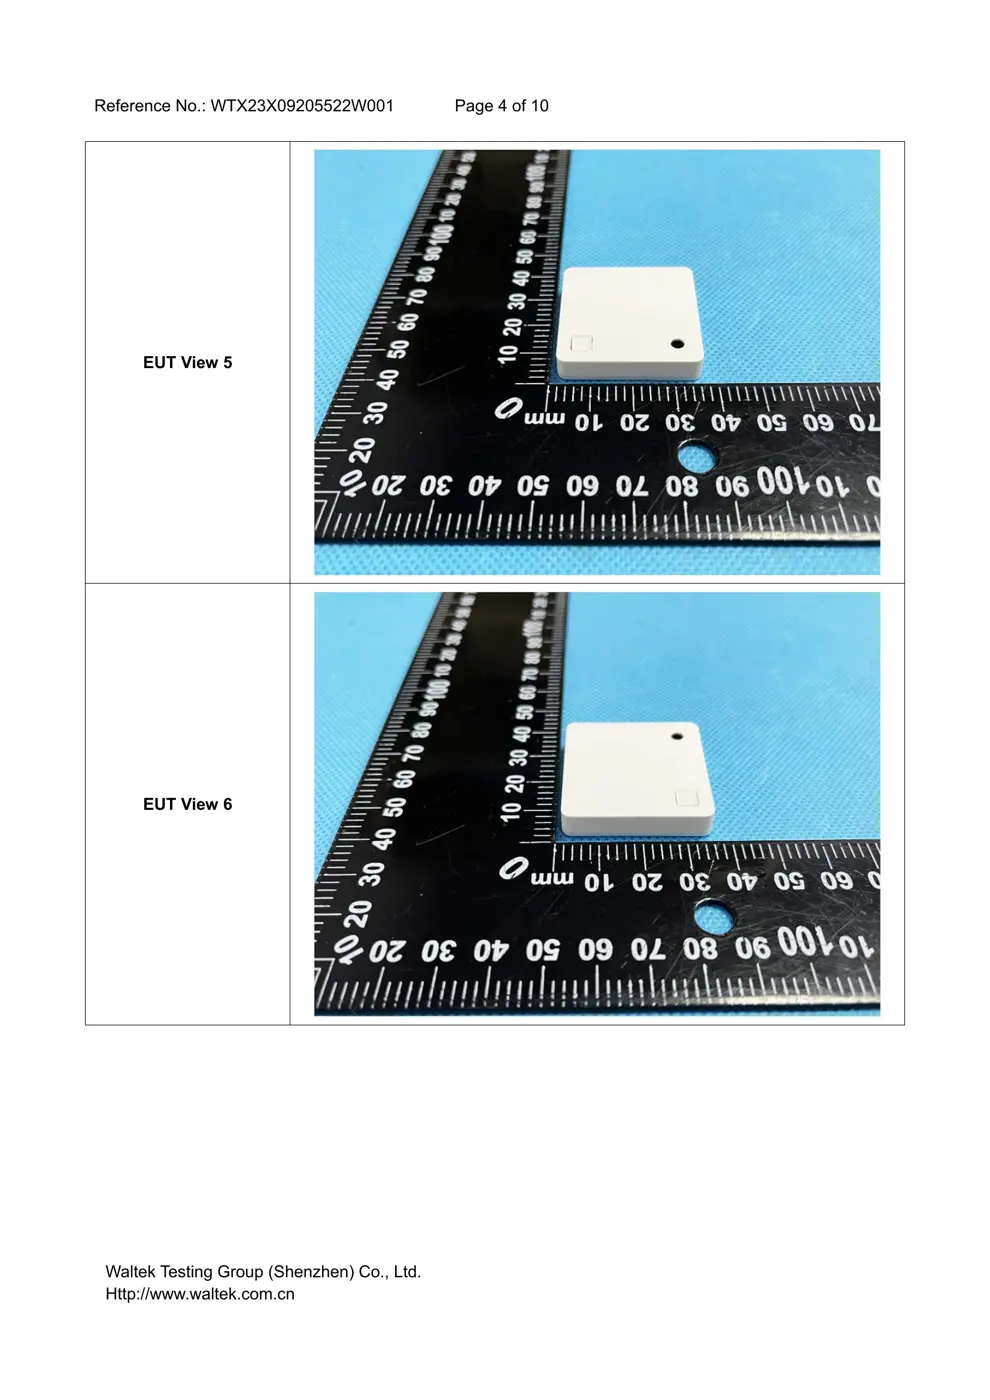
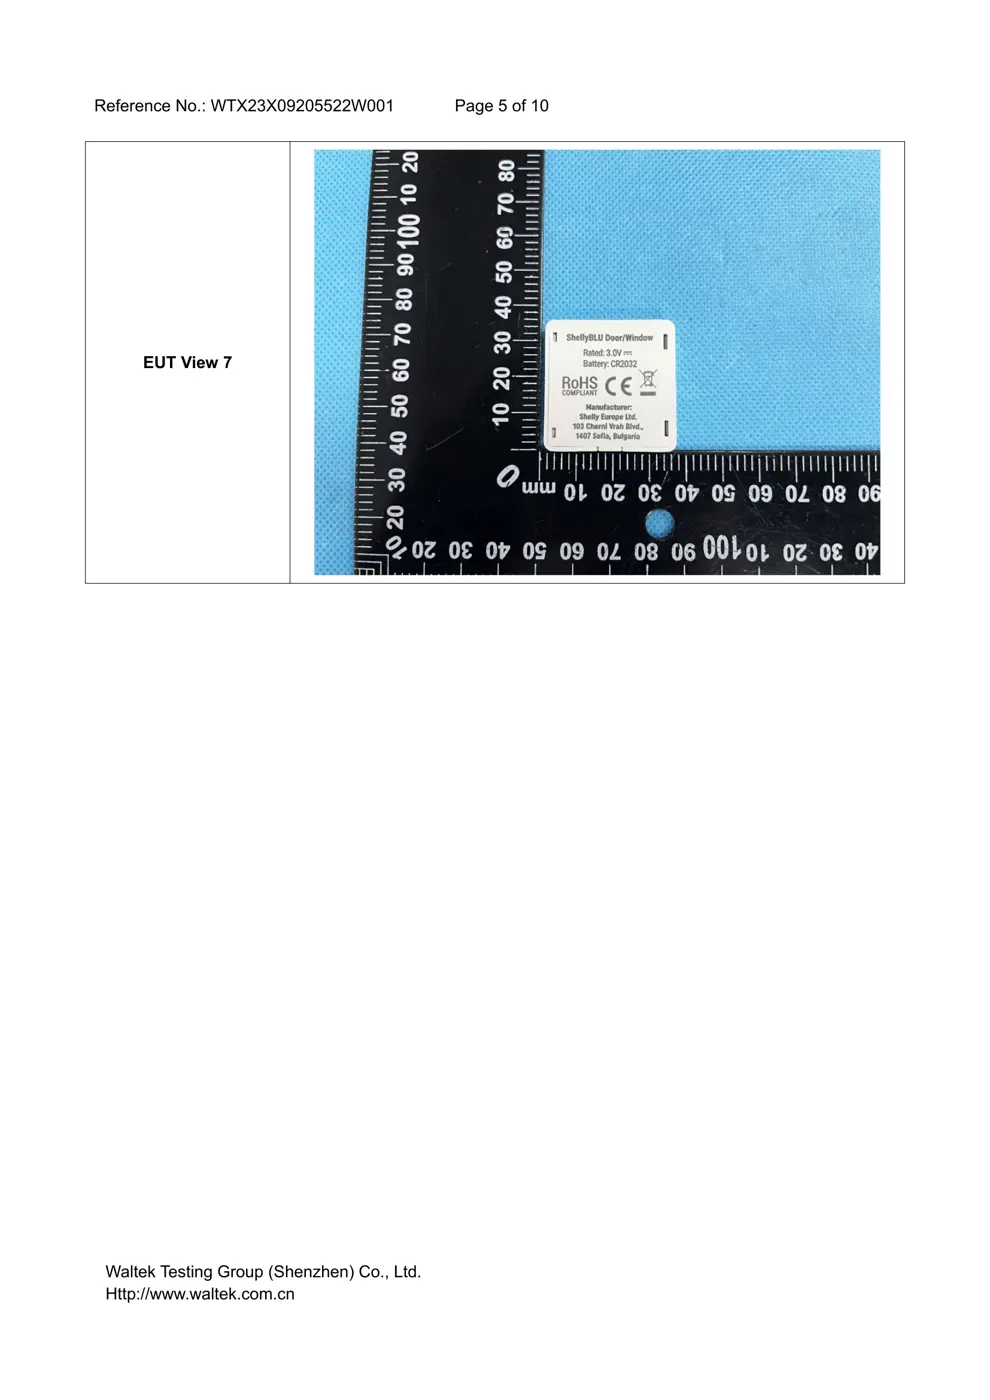
External Photos
Photos of the device exterior:
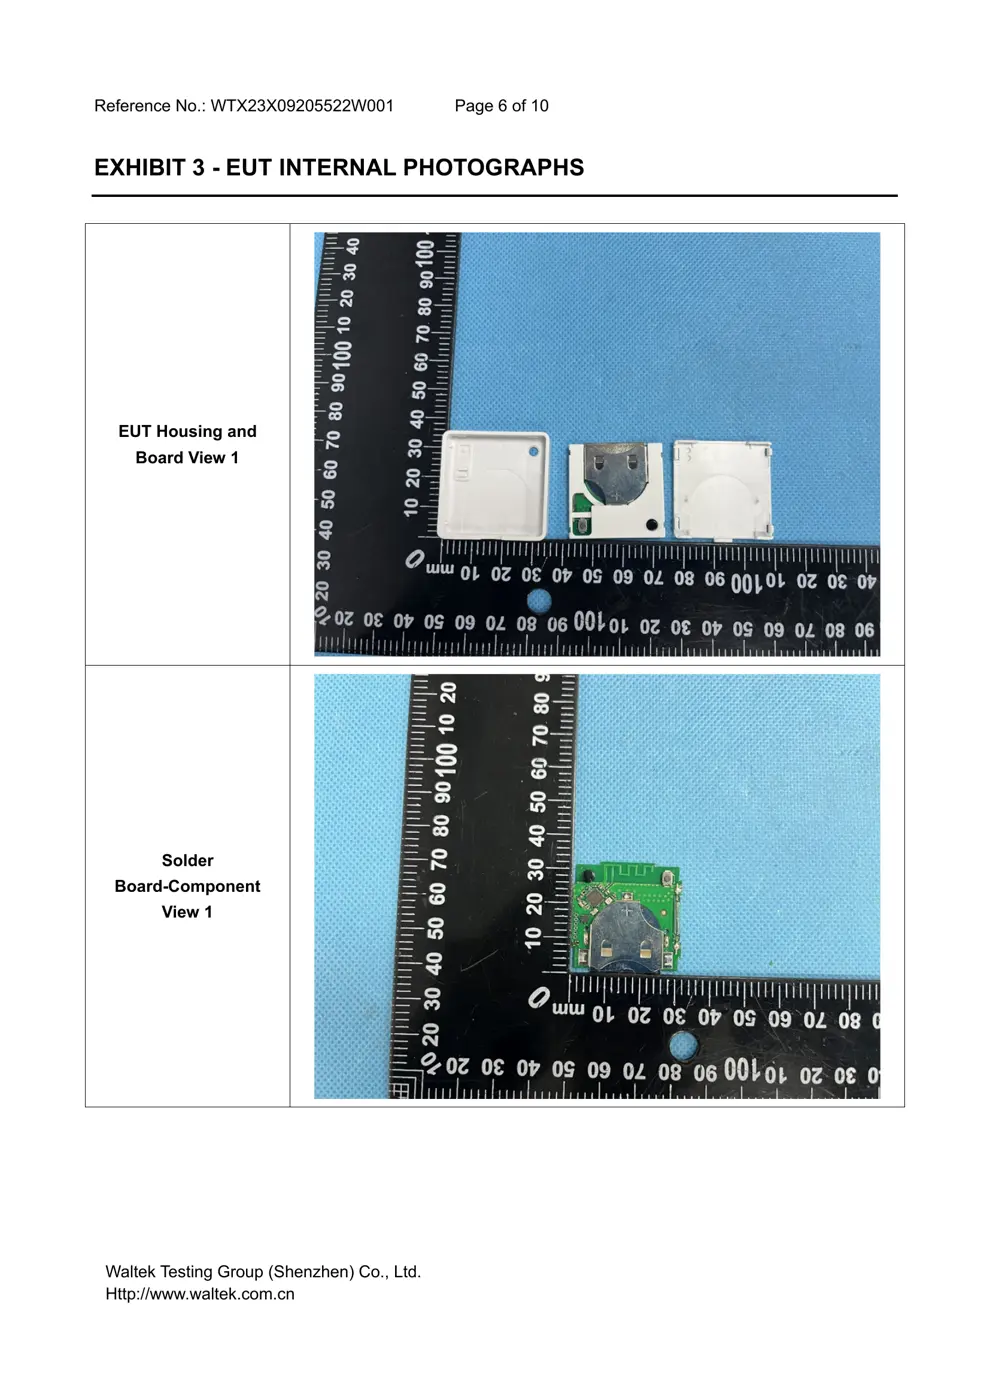
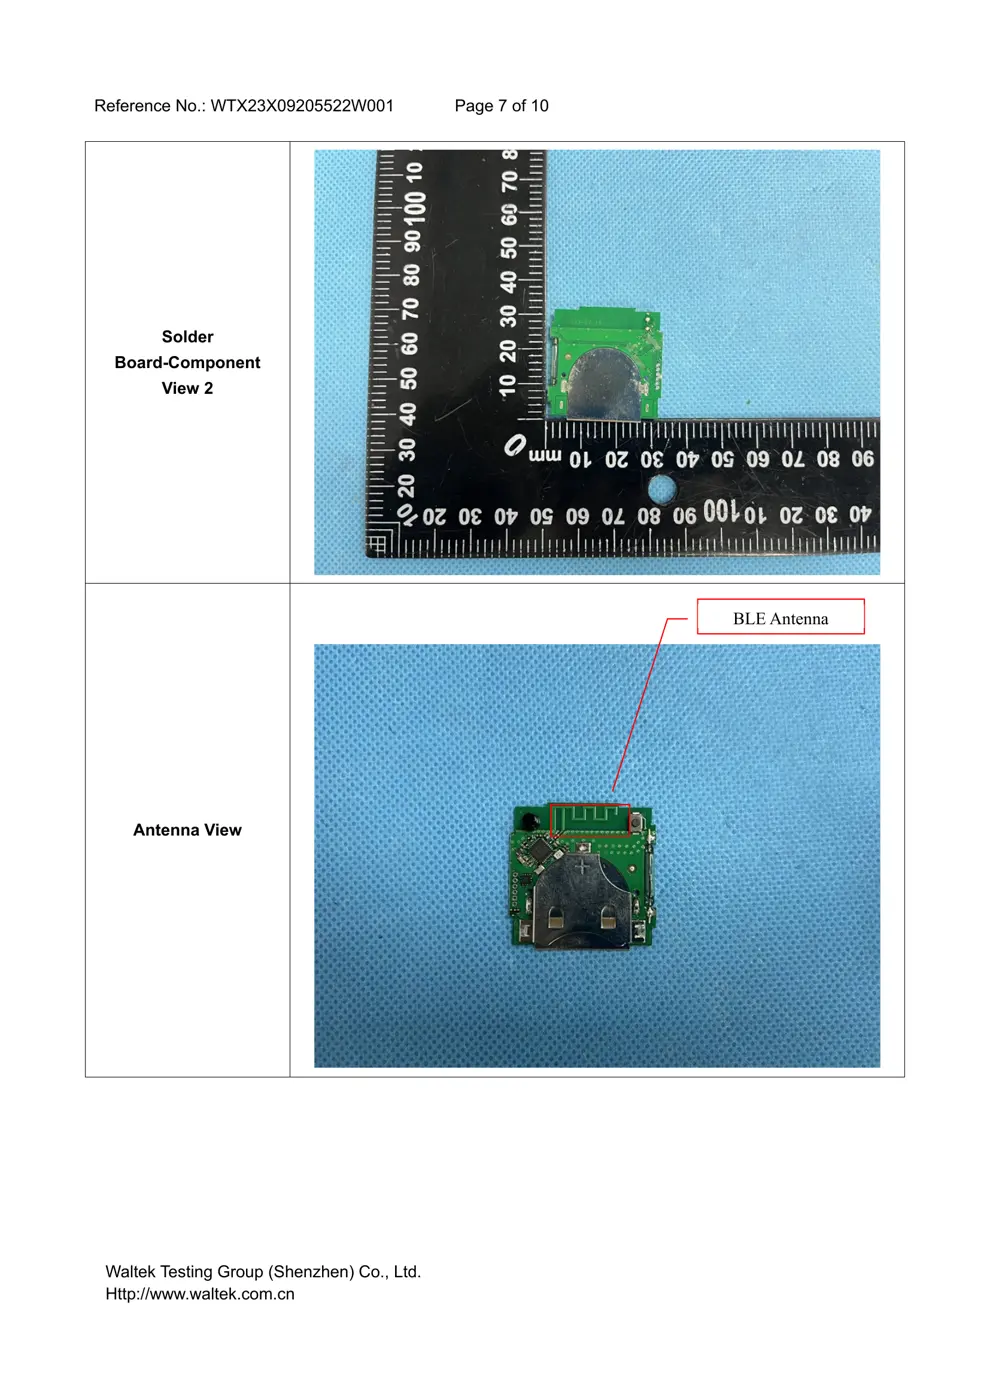
Internal Photos
Teardown photos showing the PCB and components:

Verdict
The SHELLYBLUDW is a Bluetooth device from the Shelly ecosystem.
📄 Click to view full text manual (SEO)
EN
USER AND SAFETY GUIDE
Shelly BLU Door/Window
Read before use
This document contains important technical and
safety information about the device, its safe use and
installation.
⚠ CAUTION! Before beginning the installation, please
read carefully and entirely this guide and any other
documents accompanying the device. Failure to follow
the installation procedures could lead to malfunction,
danger to your health and life, violation of law or refusal
of legal and/or commercial guarantee (if any). Shelly
Europe Ltd. is not responsible for any loss or damage
in case of incorrect installation or improper operation
of this device due to failure of following the user and
safety instructions in this guide.
Shelly® devices are delivered with factory-installed
firmware. If firmware updates are necessary to keep
the devices in conformity, including security updates,
Shelly Europe Ltd. will provide the updates free of
charge through the device Embedded Web Interface
or the Shelly mobile application, where the information
about the current firmware version is available. The
choice to install or not the device firmware updates is
the user’s sole responsibility. Shelly Europe Ltd. shall
not be liable for any lack of conformity of the device
caused by failure of the user to install the provided up-
dates in a timely manner.
Product Introduction
Shelly BLU Door/Window (the Device) is a Bluetooth
sensor designed to detect the opening and closing of
a door or window. It can also measure the inclination
of a door or window that tilts and turns. In addition, it
features a light sensor.
Installation Instructions
⚠ WARNING! Do not allow children to play with the
magnets. Even relatively small magnets can cause se -
rious injury if swallowed.
⚠ CAUTION! Keep the Device away from liquids and
moisture. The Device shouldn't be used in places with
high humidity.
⚠ CAUTION! Do not use if the Device has been dam -
aged!
⚠ CAUTION! Do not attempt to service or repair the
Device yourself!
⚠ CAUTION! The Device may be connected wirelessly
and may control electric circuits and appliances. Pro -
ceed with caution! Irresponsible use of the Device may
lead to malfunction, danger to your life or violation of
the law.
First steps
Shelly BLU Door/Window comes ready to use with the
battery installed.
However, if pressing its button does not make the De -
vice start emitting signals, you might need to insert a
battery.
See the Replacing the battery section.
Mounting
⚠ ATTENTION! When mounting the Device make sure
the small triangle on the sensor unit points towards the
magnet as shown in Fig. 2 and the distance between the
sensor unit and the magnet is less than 10 mm / 0.4 in
when the door or the window is closed.
You can place the magnet left, right, above, or below
the sensor unit.
If you want to monitor a door or window that tilts and
turns, mount the sensor unit (C) on the door or the
window (A) and the magnet (D) on the frame (B) as
shown...